|
|
 I never made souffle before because I thought it would be so difficult to make. I’ve only seen the making of souffle on one of my favorite tv show, Hell’s Kitchen. Even there with professional kitchen and cook, they still failed to make souffle now and then. Thanks to KBB’s challenge this month that I had to make it and believe me it was not as difficult as I thought it would be. I never made souffle before because I thought it would be so difficult to make. I’ve only seen the making of souffle on one of my favorite tv show, Hell’s Kitchen. Even there with professional kitchen and cook, they still failed to make souffle now and then. Thanks to KBB’s challenge this month that I had to make it and believe me it was not as difficult as I thought it would be.
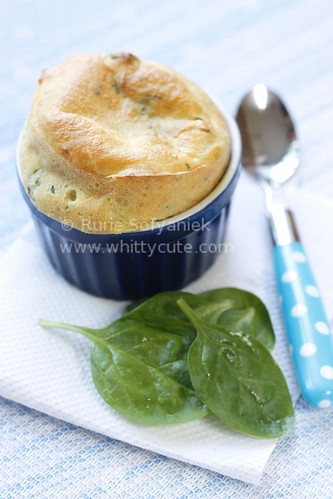
I didn’t make any changes on the ingredients and method, just one thing that I added was a handful of shredded spinach leaves. No major difficulty that I found during the baking. It came out nicely puffed and fluffy. One thing I would do different next time would be the cayenne pepper. I hardly notice the taste on my souffle, so next time I would definitely add more.
On the other hand, the photo session was a bit challenging for me. As you know, souffle would only be puffed up for some minutes before it would slowly fall. I think I failed photo-wise. The photo session was so hectic, I was running here and there between the kitchen and the photo set. One good picture I made was not so puffed up.
All in all it was a really good experience and challenge. Thanks to KBB, from now on, I wouldn’t be scared to make souffle again.
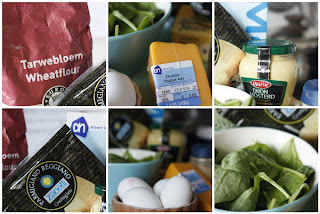
Ingredients:
– 100 gr unsalted butter
– 1/2 cup plain (all purpose) flour
– 300 ml milk
– 1 cup grated cheddar
– 2 tbs freshly grated parmesan
– 1/2 tsp Dijon mustard
– Pinch cayenne pepper
– 4 eggs
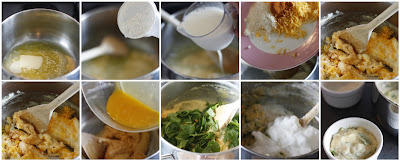
Directions:
– Preheat the oven to 190C (375F, Gas Mark 5). Grease and lightly flour six ½-cup-capacity souffle dishes.
– Melt butter in a small saucepan over low heat. Add the flour and cook, stirring constantly, for 1 minute. Gradually add the milk and whisk continuously over medium heat until the mixture is smooth, thickens and comes to the boil. Allow to cool for 5 minutes.
– Transfer the mixture to a bowl and stir in the cheddar, parmesan, mustard and cayenne pepper. Mix well.
– Lightly beat the egg yolks and add these to the cheese mixture. Mix well.
– With an electric mixer, whisk the egg whites in a clean bowl until firm peaks form. Fold a quarter of the whites through the cheese mixture to slacken it slightly, then gently fold through the remaining whites.
– Spoon the mixture into the prepared dishes and bake for 20-25 minutes, or until risen and golden. Don’t be tempted to open the oven until the souffles have risen. Serve immediately.
Source: The Perfect Cookbook by David Herbert. Penguin Books Australia Ltd 2003.

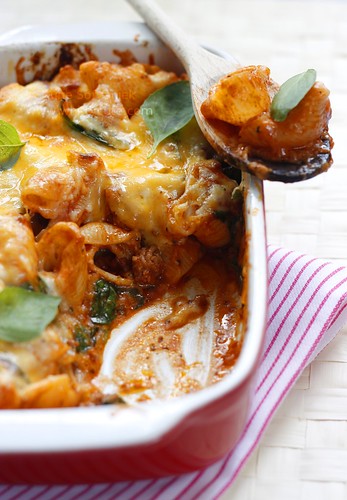
If you are tired of the same old spaghetti bolognese you could try to make it this way. It tasted just like lasagna but with different texture and most importantly it tasted yummy.

Ingredients:
– One recipe of bolognese sauce
– One recipe bechamel sauce
– 300gr of pasta of your choice, for example penne rigate like I used here.
– Handful of shredded Gouda cheese (or any other melting cheese)
Directions:
– Layer the pasta along with bolognese sauce, bechamel sauce, shredded Gouda cheese.
– Repeat layer one more time.
– Bake in preheated oven 180C for 20 minutes or until bubbly.
– Serve with salad and ciabatta bread.
Duh punya utang posting ama Teh Mira ^_^ Maap ya pake lama bu….
Actually I wanted to make banana cake ala Nich Rachmah that day but…….when I opened her FB I saw Mira just posted this. Uh oh so I changed my mind and cheated on Ning Rachmah…..hiahaha….sorry ya….aku berpaling ke lain hati……sama seperti Mira…..
I brought this along with Espresso Brownies to my last day of school which mean the exams announcement day. The teacher and my fellow classmates loved the cakes that I brought. But mind you it’s not a real school that I was following, just a course I’m taking to learn Dutch or NT2 (Nederlands voor Tweede Taal) or Dutch as Second Language or in my case as third language lol. Yes I did passed the niveau 2 (level 2) with somewhat flying colors (lol-kepala-besar-mode-on) and in September I am going to continue niveau 3. Wish me luck ^_^
Teh Mira, makasih dah share resepnya, endang banget dah ni, moist dan bumbunya kerasa…..jadi pengen lagi euy….
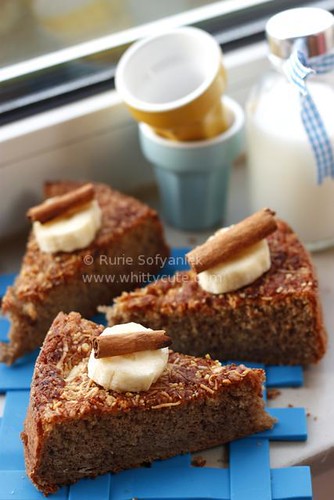
Ingredients:
– 4 eggs
– 50 gr palm sugar
– 25 gr sugar
– 1/4 tsp salt
– 1/2 tsp emulsifier (SP/TBM)
– 120 gr flour
– 1/2 tsp spekkoek spices (I used 1 tsp)
– 1/4 tsp baking powder
– 100 gr banana, pound until smooth
– 25 gr butter, melted
Directions:
– Shift all dry ingredients.
– Grease and sprinkle with flour a tulband baking pan (I used 20cm round baking pan).
– Whisk eggs, palm sugar, salt and emulsifier until fluffy.
– Add shifted dry ingredients, mix together carefully.
– Add banana and melted butter, mix together.
– Pour in the baking pan and bake in preheated oven 180C until done.
Source: Tabloid Saji through Mira Assjarif
Back home I always complained whenever my mother cooked tempe because I feel I’ve eaten it too much and I got enough of it. But now give me tempe anytime of the day and I would happily eat it.
This dish is easy to make even though it looks rather complicated but it’s worth all the effort.
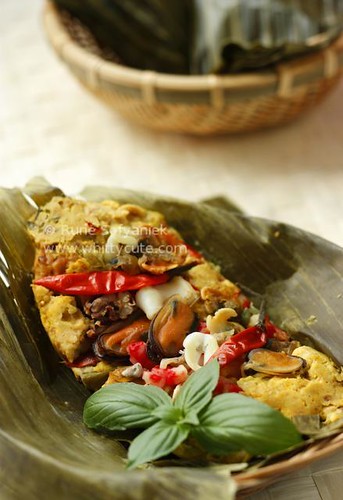
Ingredients:
– 400 gr (1 block) tempe, steamed or pan fried 1/2 done, pound coarsely
– 1 handful seafood medley (clams, shrimp, squid)
– 50 ml thick coconut milk
– 2 red chili, thinly sliced
– 4 shallots, thinly sliced
– 1 egg, lightly beaten
– 1 stalk spring onion, cut 1/2 cm
– 1 tsp salt
– 1 handful hairy basil
– Pinch of sugar
– 10 salam leaves
– 10 bird’s eye chili
– Banana leaves for wrapping
– 2 tbs vegetable oil
Spice Paste:
– 8 shallots
– 4 garlic
– 1/2 tsp coriander
– 1 cm turmeric, grilled
– Pound spice paste ingredients until smooth with a pestle and mortar or in a food processor.
Directions:
– Fry spice paste mix with vegetable oil until fragrant. Take off from fire add salt and sugar, mix well.
– Mix pounded tempe, seafood medley, coconut milk, egg, red chili, shallots, spring onion, hairy basil and fried spice paste.
– Take one banana leaf, place one salam leaf in the bottom and add the tempe mix. Wrap the leaf with tooth pick.
– Steamed for 30 minutes until done. Grilled until fragrant.
Source: Modification from Sedap Magazine
 Time for masbar again 🙂 and this month’s theme is really healthy and also real nice. Why healthy because it’s vegetable and nice because it’s Indonesian. Oh how I love Indonesian food (lebay-mode-on). Talking about this dish, it’s really popular in Bali. It’s originated from the eastern part of Bali which is Klungkung but you could easily find it in other part of Bali. I used to buy it for just Rp. 1000,00 a package (though not sure about the price now?) at the pasar senggol (night market) and it was more than enough for two persons to accompany rice. I warn you though, if you’re not so fond of -oh-darn-it’s-so-hot-makes-my-mouth-on-fire-kinda-food- then better ask less of the sambal koples (peanut sauce). But for me the hotter the better. Oh how I miss Bali….sob sob….. Time for masbar again 🙂 and this month’s theme is really healthy and also real nice. Why healthy because it’s vegetable and nice because it’s Indonesian. Oh how I love Indonesian food (lebay-mode-on). Talking about this dish, it’s really popular in Bali. It’s originated from the eastern part of Bali which is Klungkung but you could easily find it in other part of Bali. I used to buy it for just Rp. 1000,00 a package (though not sure about the price now?) at the pasar senggol (night market) and it was more than enough for two persons to accompany rice. I warn you though, if you’re not so fond of -oh-darn-it’s-so-hot-makes-my-mouth-on-fire-kinda-food- then better ask less of the sambal koples (peanut sauce). But for me the hotter the better. Oh how I miss Bali….sob sob…..
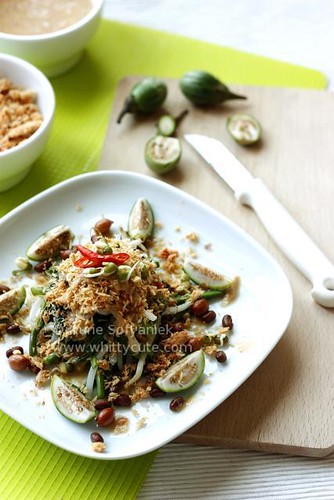
For 4-6 persons
Ingredients:
– 750 gr of mixed vegetables such as; yard long beans, water spinach, bean sprouts, spinach, winged beans, cut, cleaned and blanched
– 100 gr green aubergine
– 50 gr pigeon pea (kacang gude) (I used red beans), boiled
– 50 gr fried peanuts
– 50 gr short bean sprouts, washed
– 50 gr soy beans, boiled
For the Sambal Koples (Peanut Sauce)
– 75gr roasted peanuts
– 3 red chili
– 2 tsp dried shrimp
– Juice of 1 leprous lime (or kaffir lime if unavailable)
– 100 ml water
– 100 ml coconut oil
– Salt
For the Sambal Kelapa (Coconut Sauce)
– 1 garlic, finely chopped
– 2 cm fresh galangal, finely chopped
– 2 cm fresh lesser galangal, finely chopped
– 3 red chili, finely chopped
– 10 bird’s eye chili, finely chopped (less or more depending on your taste buds)
– 1 tsp dried shrimp
– 1 tsp palm sugar
– Salt
– 150gr freshly grated coconut
Directions:
– To make the peanut sauce, use a pestle and mortar (me: food processor) to pound the peanuts, chilies and shrimp paste into a fine paste. Add the lime juice, water, coconut oil and a little bit of salt and mix well.
– To make the coconut sauce, use a pestle and mortar to pound the garlic, galangal, lesser galangal, chillies, shrimp paste, sugar and a little salt to a paste. Mix in the grated coconut.
– Just before serving, mix the vegetables and sauces together.
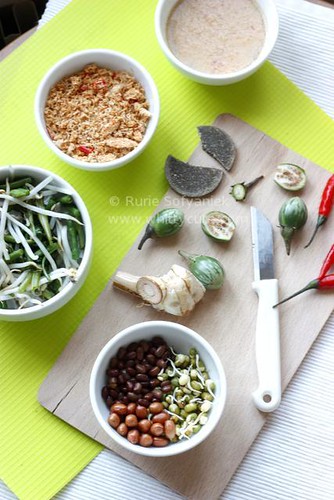
Source: Adapted from The Bali Cookbook by Lonny Gerungan
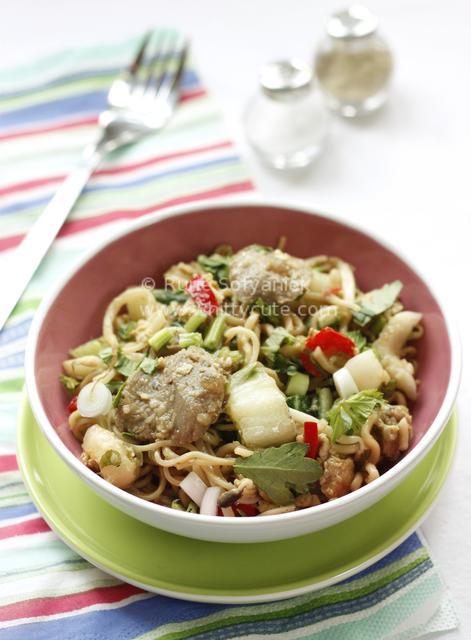
What makes a Chinese style fried noodle and Javanese fried noodle different from each other? I’m not an expert but I think it lies on the spices that is being used in both dishes. Minced garlic and sauces including soy sauce are being used in Chinese style but pound shallots, garlic and some other Indonesian spices are being used in Javanese style as well as kecap manis (Indonesian sweet soy sauce). The texture on both dishes are also different, Javanese style has somewhat wet texture thanks to the addition of chicken broth while the Chinese one has a dry texture. Then if I’m not mistaken, Javanese noodle is cooked with anglo which is a traditional stove using coal as it’s fuel while Chinese used wok with a very high temperature stove.
But I’m in no position to debate which one got better taste as both of them are equally delicious in their own special way.
Ingredients:
– 500 gr lomi (wet noodle, has bigger diameter than normal noodle, but if it’s not available use 250 gr normal noodle)
– 1 tbs kecap manis
– 1 tbs soy sauce
– 100 gr cooked chicken, shredded
– 5 beef meatball. sliced
– 2 eggs, lightly beaten
– 1/2 red tomato, cubed
– 50 gr bean sprouts
– 50 gr cabbage, sliced
– 3 choy sam, cut
– 2 tbs kecap manis
– 1/2 tbs soy sauce
– 1/2 tsp salt
– 1 tsp pepper
– 1/2 tsp sugar
– 250ml chicken broth
– 2 spring onion, sliced
– 2 tbs vegetable oil
– Fried onion
– Celery, chopped
Spice Paste:
– 4 garlic
– 5 shallots
– 3 candlenuts, roasted
– 15 gr dried shrimp, soften in hot water for couple minutes and fried
– Pound spice paste in pestle and mortar until smooth or in a food processor.
Directions:
– Mix noodle with 1 tbs kecap manis and 1 tbs soy sauce.
– Fry spice paste in vegetable oil until fragrant. Set on the side of the pan, add eggs, scramble eggs.
– Add shredded chicken and beef meatball. Mix well, add tomato, bean sprouts, cabbage, choy sam. Mix well.
– Add kecap manis, soy sauce, salt, pepper and sugar, mix well. Add chicken broth, continue cooking until broth has evaporated and vegetable is done.
– Add noodle, cooked until done. Add fried onion and chopped celery.
Source: Sedap Magazine
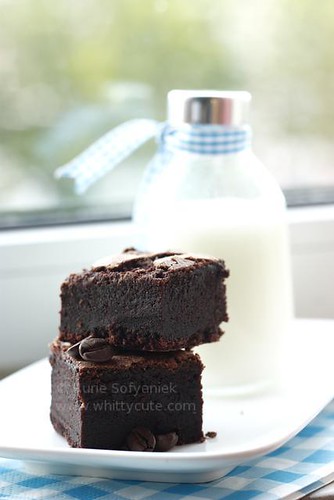
They say always use the best quality cooking chocolate you can afford to achieve the best result in making brownies. But the thing is dark cooking chocolate here is so darn expensive and I tried couple of times making brownies with a really good brand like Callebaut and Lindt but why oh why I found they were too bitter to my taste buds. Was it just me or what? I used to use Colatta dark cooking chocolate back home and it was totally fine. It seems that dark cooking chocolate here contains more cocoa than back home? Anyone got answer? I guess I’m just so used to product I used back home that when I got the chance to use other type of product my tongue refused it 😛 But hey that’s also okay, it means I didn’t have to break the bank just to make a loaf of brownies.
Oh and for your information this brownies I made with supermarket brand milk cooking chocolate, precisely the Albert Heijn (AH) merk. AH you should thank me for a free commercial 😛 The price was lets say 1/4 of the branded chocolate but it was better for my taste buds.
Verdict: one of the best brownies I made ever. Thanks to Ning Rachmah for sharing the recipe.
Ingredients:
– 230 gr good quality plain chocolate melted(I used AH milk chocolate)
– 115 gr butter
– 300 gr caster sugar (I used 250gr)
– 5 large free range eggs, lightly beaten
– 4 tablespoons, strong espresso coffee, room temperature (I used 8 tbs)
– 70 gr plain flour
– 70 gr cocoa powder, plus extra for dusting
Directions:
– Beat butter and sugar until smooth.
– Whisked eggs lightly just until they are well mixed, add whipped butter and sugar with the eggs. Mix well, add espresso coffee.
– Sieve dry ingredients; flour and cocoa powder. Add into the batter, mix well.
– Add melted cooking chocolate, mix well.
– Grease a square baking pan 20x20x4cm with butter and lightly dust with cocoa powder.
– Pour batter and bake in preheated oven 160Celcius for 35-45 minutes until brownies in done.
Source: Brownies by Linda Collister through Rachmah Setyawati

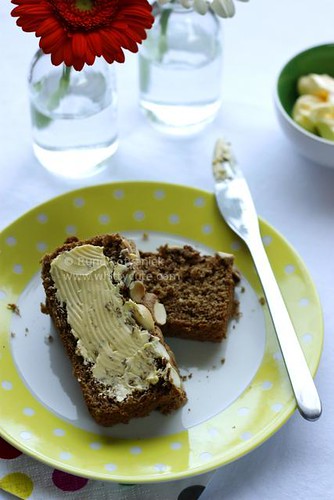
Waaa, it’s time again for KBB challenge….and what is funny, this time it’s onbijtkoek aka breakfast cake 😛 I never made this cake before because obvious reason that it’s available everywhere here but also because I don’t really like Dutch style ontbijtkoek, I like the Indonesian’s version better. If you ask me why, maybe it’s just my personal opinion but Dutch ontbijtkoek doesn’t have the “bite”, the taste is too flat compared to Indonesian’s one. Indonesian’s one got more spice flavour …..or maybe it’s just because I’m Indonesian 😉
For this challenge, I didn’t modify any ingredients because I wanted to see how would the cake turned out. And luckily I have all the ground spices so no need to buy anything extra for this challenge. Only there was no kenari (Javanese almond) available here, so I just used the normal almond. Even no baking powder or emulsifier needed. Though I did change the last bit of the step, I didn’t wait for 20 minutes to add the almond instead I just added right from the start. Because from my experiences after 20 minutes the cake surface would be dry already therefore no almond would stick 😛 The end result was nice bouncy cake though it was a bit dry but it was expected, and we ate it just like the Dutch would eat it here, with slab of butter/margarine. In texture it was lighter and bouncier than the Dutch version. All in all it was a really easy cake to make, economic one also and taste wise it was approved by a real Dutch men 😉 as I quote here “it tasted better that shop bought ontbijtkoek” het was lekker toch schatie ^_*
So sorry for the step by step pictures, you might wonder whatever happened with after all the ingredients were in the bowl then suddenly mixing was finish. Where were the middle processing….It was a long story but short version was, after the second picture, the card was full I used another one but that one was broken and I lost some pictures including the middle process of baking :s
Ingredients:
– 125 gr palm sugar– 5 egg yolks
– 3 egg whites– 125 gr flour
– 1 tsp ground cinnamon– 1/2 tsp ground nutmeg– 1/4 tsp ground cloves
– 50 gr kenari (I used almond) Directions:– Sift together cinnamon, nutmeg, cloves and wheat flour. Set aside. Directions:– Sift together cinnamon, nutmeg, cloves and wheat flour. Set aside.
– Beat egg yolks, egg whites and palm sugar until thick and frothing.
– Add the sifted ingredients and stir well
– Pour into a loaf baking pan lined with grease-proof paper that has been brushed with butter and sprinkled with flour.– Bake at 160C for about 20 minutes until half-done. Sprinkle with almond slices, continue baking for another 20 minutes until it is done. (I didn’t do it like this, instead I added almond right from the start of baking time)
Source: Book of Kue Kue Indonesia by Yasa Boga

 Yay I finally could upload my entry for this month’s masbar. Don’t know why my spirit to blog has dropped a bit lately. I still cook and bake and take photos too but just lazy to upload it into this blog… :s Hopefully it wouldn’t be long until I found my mood back again. Yay I finally could upload my entry for this month’s masbar. Don’t know why my spirit to blog has dropped a bit lately. I still cook and bake and take photos too but just lazy to upload it into this blog… :s Hopefully it wouldn’t be long until I found my mood back again.
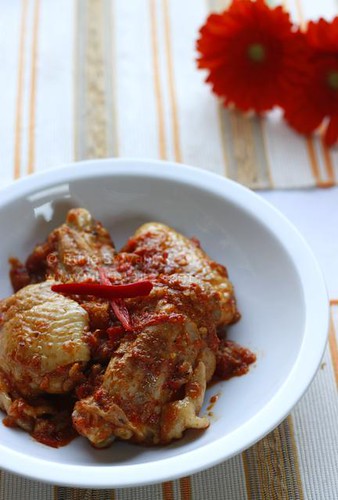
This month’s theme is chicken dish from North Sulawesi. Chicken is my favorite meat and dishes from North Sulawesi is usually hot and spicy. I love chicken in any way and my life would be bland without my spices and chilies, so I was more than happy to make this dish.
For 3-4 persons
Ingredients:
– 500 gr chicken pieces
– 1/2 tsp salt
– 1 tbs lemon juice
– 2 small tomatoes, diced
– 1 cm ginger, bruised
– 1 lemongrass, bruised
– 2 kaffir lime leaves
– Salt
– 2 tbs oil
– 150 ml water
For the spice paste:
– 5 red chili (less or more depending on your taste buds)
– 10 bird’s eye chili (less or more depending on your taste buds)
– 5 shallots
– 3 garlic
Directions:
– Marinade chicken pieces in lemon juice and salt for appoximately 15 minutes.
– Pound spice paste ingredients until smooth.
– Heat up oil in a pan, add spice paste, ginger, lemongrass and kaffir lime leaves when the oil is hot.
– Fry until the spice is done, add chicken pieces.
– Continue stirring until chicken turns color.
– Add water and salt, continue cooking until water has evaporated and chicken is cooked.
– If you prefer, you could grill the chicken little bit just until it’s nicely brown.
– Serve with steamed white rice.
Source: Adapted from the book Masakan Indonesia by Yasa Boga
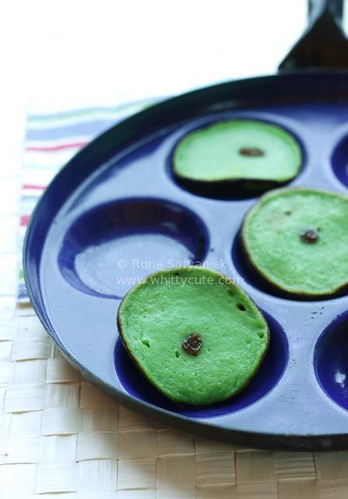
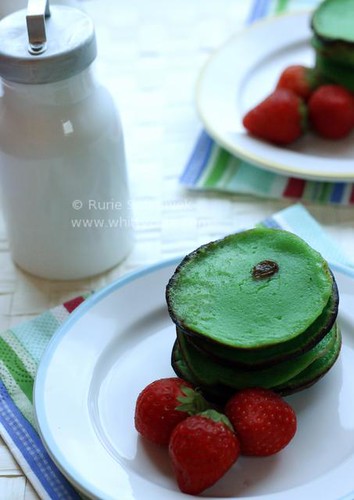
I’ve been wanting to try this recipe for so long, but I didn’t have the proper mold for the cake until I went to one of my favorite’s shop, kringloop or thrift shop. You could click on the link to see what kind of a shop is that. There I saw this one, looked never been used. The size and cavities were not so deep like original mold but I thouhgt it would do the same job. For a mere 1 I got a new mold. And yes I was right, I could use it for this cake. What’s next? Takoyaki perhaps?
Ning Rachmah terimakasih ya resepnya ^_^
Ingredients:
– 110 cc milk
– 65 gr sugar (I used 40 gr)
– 2 eggs
– 30 gr flour
– 50 gr steamed potato, pound smoothly
– 1/4 tsp salt
– 125 gr fermented cassava, pound smoothly
– 20 gr melted butter
– 1/2 tsp pandan paste
– Some raisins
Directions:
– Beat eggs with whisk until thick.
– Add flour, salt, sugar and eggs in a bowl, add milk and mix throughly.
– Add whisked eggs, mix well.
– Add potato and fermented cassava, mix well.
– Add melted butter, mix well, add pandan paste.
– Heat up the mold on the stove, brush lightly with butter.
– Pour batter into each holes until 3/4 full, top with raisins. Cover with the lid (I just used pan lid), let it cook until the cake is done. When it’s done the cake will rise.
– Take out from the mold, cool it down and serve.
Source: Rachmah Setyawati
|
Awards
 My First Award, Thank You!
Whittycute Foodie Event
 Click here to see the round up!
|


