|
|

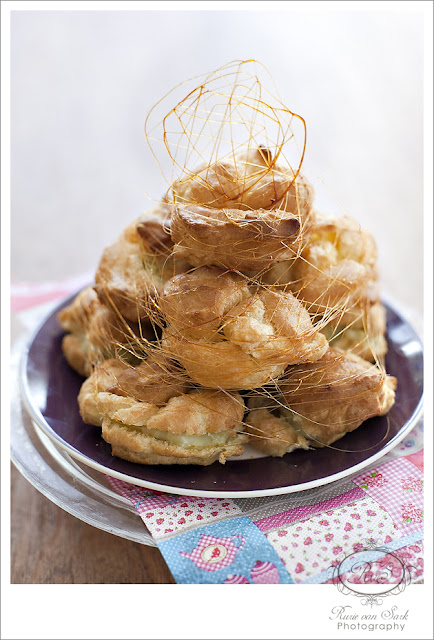
Upon reading this month’s challenge my mind wandered to one particular series, Desperate Housewives. There was this particular episode where Bree van de Kamp couldn’t perform the making of spun sugar for her croquembouche. With that thought I cringe, if the domestic goddess Mrs. van de Kamp couldn’t make it then what about me? But it wouldn’t be KBB if not without challenge. Though I only tried it once, that after looking at tips and tricks from my fellow KBB’ers, I have to say was way far than perfect but I’m glad I did try it and BRAVO KBB. Recipe for the Choux Pastry with Custard Filling can be found here


Spun Sugar
Ingredients:
– 100 gr sugar
– 1 tsp water
– Heat sugar with water in a sauce pan in a lowest fire possible, use the smallest hob you have.
– Don’t stir with spoon etc just shake the handle now and then
– Heat through until caramelized, take off from the fire and let it cool down for some minutes.
– Take two chopsticks, sticks your caramel on the edge. Stick the two chopsticks together and take them apart from each other, by now your spun sugar should be ready to be rolled around your choux pastry.
– Repeat until you are satisfied with the result.
– For the top decoration, lay a piece of baking paper on the counter, use a fork/spoon to make pattern of your choice.
– Let it cool for couple of minutes and ready to be used.

As Indonesian we are craaaaaazy about sambal, I don’t think we can live without it. Sometime ago when I heard that the chili price has gone up more than 100% even way more expensive than the beef I could feel the sadness of the Indonesians. But it’s true sambal makes up for everything, it compliments the protein/vegetable dish while it is still a great condiment when paired only with plain rice and krupuk. Anyhow let me share my favorite and easiest sambal ever!
Ingredients:
– Bird’s eye chili (becareful on how many chillies you are using)
– 1 shallot
– 2 cherry tomatoes (or 1/2 tomato)
– Pinch of salt
– Pinch of sugar
– 1/2 tsp terasi (dried shrimp paste) terasi can make or break your sambal, so make sure you’re using the best brand around.
Directions:
– Gather all your ingredients in a pestle and mortar.
– Pound away until all ingredients are smooth, have a taste if you dare and adjust.
– Serve with steamed hot rice and your choice of vegetable/protein dish.
– To obtain the best experience eat with your barehands.


Me and hubby were literally fighting over the last bit of this dessert because it was SO GOOD! There I said it with capital letters. It was velvetty chocolatty (does this word exist?) without being over powered, perfect dessert. If I got no competition I bet I would gobble it all by myself. Having said that I never made creme brulee before because I thought it would be so darn difficult. It turned out not at all! Ah this is why I love love my KBB, the group has challenged it’s member in every aspect of baking we didn’t know we could.
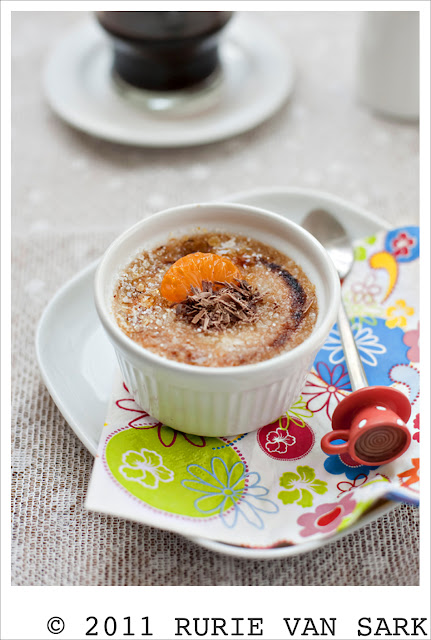
Serves 6 ramekins (I made half recipe which yielded into 4 ramekins)
Ingredients:
– 300g fresh rhubarb (didn’t use this, instead I used 150gr good quality milk chocolate)
– 3 Tbs caster sugar
– 2 vanilla pods
– 300ml double cream
– 200ml full fat milk
– 8 egg yolks
– 80g sugar (reduced until 50gr)

Directions:
– Preheat the oven to 140C/275F/Gas
– Roughly slice up the rhubarb and place it in a pan with the caster sugar and 5 tablespoons of water. Simmer until tender, divide between 6 small serving dishes which your brulee will be cooked in, then set aside. (omitted this but insted melt milk chocolate in a double boiler or microwave will do)
– Score the vanilla pods lengthwise and run the knife up the pod to remove the vanilla seeds. Scrape these into the pan with the pods, cream and milk and slowly bring to the boil.
– Meanwhile beat together the yolks and the sugar in a bowl until light and fluffy. When the cream and milk are just boiling, remove the vanilla pods and add little by little to the egg mixture, (add the melted milk chocolate also at this point) whisking continuously. I like to remove any bubbles or froth from the mixture before dividing it into the serving dishes, on top of the rhubarb.
– Stand these in an appropriately sized roasting tray filled with water half way up the containers, and bake in the pre-heated oven for around 25 minutes until the custard mixture has set but is still slightly wobbly in the centre.
– Allow to cool to room temperature then place in the fridge until ready to serve. Sprinkle with sugar and caramelize under a very hot grill or using a kitchen blowtorch. Lovely.
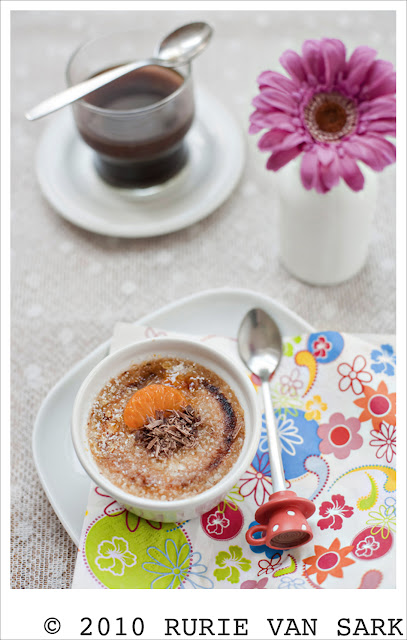
Source: Book Naked Chef 2 by Jamie Oliver
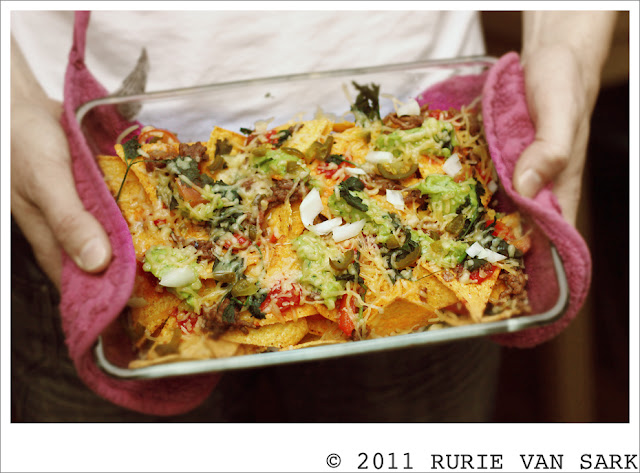
A crowd pleaser snack, I haven’t met anyone who dislike this warm crunchy spicy dish. If you think it’s difficult to make, you’re wrong although I made my own guacamole but you can also cheat and use shop bought guacamole. But let me tell you a secret, nothing beats the taste of a homemade guacamole and it’s easy to make. Let’s make this tomorrow for movie night in shall we ^^
Ingredients:
– 1 package tortilla chips
– 1/2 quantity of guacamole
– 1/2 onion chopped
– 3 tbsp shop bought tomato salsa/chopped tomato
– 3 tbsp jalapeno chili (more or less depending on your taste bud)
– Handful shredded cheese
– Some extra coriander leaves
– 1 tub sour cream to serve
Directions:
– Layer all ingredients in a ovenproof dish and bake in a preheated oven 200C for 10-15 minutes until the cheese has melted.
– Serve with the rest of guacamole and sour cream.
I made this for Christmas lunch dessert, it was easy (remember easy is my middle name) but with a stunning result as if you spent a lot of time on it. Well actually what I needed to do was peel the pears and boil them with the rest of ingredients for couple of hours.
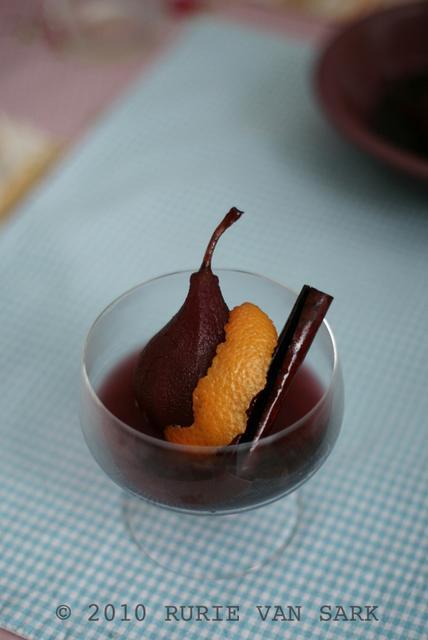
Ingredients:
– 1 vanilla pod
– 1 bottle red wine (use the cheapest one, it doesn’t really matter)
– 225 gr caster sugar
– 1 cinnamon stick, halved
– 1 thyme spring (I didn’t use it)
– 6 pears, peeled but kept whole with stalk intact
Directions:
- Halve the vanilla pod lengthways, scrape out the black seeds and put in a large saucepan with the wine, sugar, cinnamon and thyme. Cut each piece of pod into three long thin strips, add to pan, then lower in the pears.
- Poach the pears, covered, for 20-30 mins, making sure they are covered in the wine. The cooking time will very much depend on the ripeness of your pears – they should be tender all the way through when pierced with a cocktail stick. You can make these up to 2 days ahead and chill.
- Take the pears from the pan, then boil the liquid to reduce it by half so that it’s syrupy (I didn’t do this I actually like the syrupy part). Serve each pear with the cooled syrup, a strip of vanilla, a piece of cinnamon and a small thyme sprig.
Source: BBC GoodFood
![masakbareng[1]](../../wp-content/uploads/masakbareng15-150x150.png)
Turkey and Christmas remind me of the year 90’s when I was 11-ish and my adoptive American grandmother would try to relive Christmas the American way with Turkey and all it’s trimmings and A LOT of presents. Fast forward 25 years later, there is no such Christmas turkey tradition in Holland that’s when I thought why not try and make it myself. So here it is my first ever Christmas turkey.
Since I never made and got no clue at all how to roast a turkey, I looked up for the easiest recipe out there but would still have a great result. I’m always been a fan of BBC GoodFood magazine so when I found this recipe on their Christmas edition I thought I have found the recipe. Don’t be discouraged by it’s super long recipe direction, it was actually very easy. ^^

Ingredients:
– 1 turkey, about 6 kg/13lb, giblets removed (I used 4kg of turkey)
– 140 gr butter, at room temperature
– zest 1 lemon
– zest 1 orange
– 2 thyme sprigs, leaves finely chopped
– rosemary sprig, leaves finely chopped
– 4 large onions, halved
– 3 bay leaves
– 2 tbsp olive oil

Directions:
- Heat oven to 180C/160C fan/gas 4. Pat the turkey dry all over with kitchen paper. Now weigh the bird and calculate the cooking time at 40 mins per kg. Mix the butter with the zests and herbs, and season well. Gently push your fingers under the turkey’s skin, starting from the neck end of the bird, easing the skin away from the flesh over both the breasts and the tops of the drumsticks. Spread the butter under the skin, pushing it in as far as you can, then smooth the skin back into place. Halve the lemon and orange and put in the turkey cavity along with 2 onion halves and the bay leaves.
- Rub turkey all over with oil and sprinkle with salt. Arrange remaining onions in the bottom of a large roasting tin to act as a trivet for the bird. Sit the turkey on top and completely cover both bird and tin with foil to make a tent. Roast according to your calculated cooking times.
- Thirty mins before the end of the cooking time, take out the turkey and turn up the oven to 200C/180C fan/gas 6. Remove the foil and return to the oven for a further 30 mins until golden. To test, pierce the fattest part of the thigh with a skewer – the juices that run out should be clear and not pink; keep cooking if the juices are pink and re-check at 10-min intervals. If you like your turkey meat almost falling off the bones, then wiggle the leg – it should give slightly if the meat is ready to come away from the bones, keep cooking and basting until it does.
- Rest the turkey, covered loosely with foil, for at least 30 mins and up to 1 hr before serving. Strain and reserve the cooking juices and keep the onions in the tin for making gravy.
Source: BBC GoodFood
This traditional Indonesian cookie was unheard of until now 🙂 our online baking club decided to showcase this kept treasure to the rest of the world, and that we do together with other online club NCC. Having never heard nor tasted the cookie I couldn’t imagine what the taste would like though I have heard from other friends who have tried it that it was indeed a melt-in-your-mouth kinda cookie. I was intriqued, so here we are my first bangket.
I did add more butter (didn’t have margarine so I used butter) to the dough as my dough didn’t hold itself. It was more like a heap of flour I couldn’t mold at all. At. All. After adding more butter it was allright. Friends in Indonesia used special mold for this but I didn’t have any. Though in Holland we do have the same type of mold for making speculaas, but it’s ok I didn’t have it so instead I used mini muffin silicon mold. It worked perfectly fine. Later that night some friends came over and tasted the cookies. They say the cookies looked like candy but tasted like cookies.
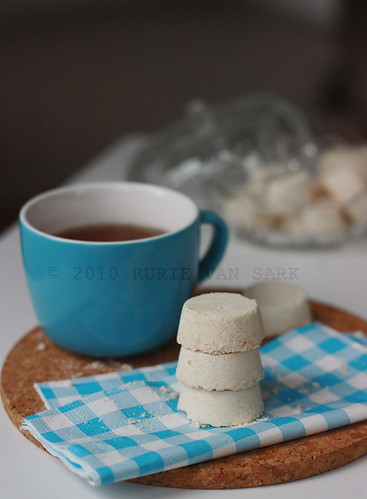
Bangket Susu (Milk Bangket)
Ingredients:
– 500 gr tapioca flour
– 100 gr margarine (I used butter and added some more later on)
– 150 gr powder sugar (was way too sweet for my own tastebuds, will reduce later)
– 75 gr condensed milk
– 2 pandan leaves

Directions:
– Pan broil the flour with pandan leaves until light, set aside to cold.
– Mix everything by hand
– Mold with kue satu mold (speculaas mold)
– Bake with low fire (140 C) approx 10-15 minutes
– Move cookies when it’s cold.
– This cookies are very fragile, arrange them in the tin and don’t move it around anymore unless you’re going to eat it 😉
Source: Nadrah Shahab
![masakbareng[1]](../../wp-content/uploads/masakbareng14-150x150.png)
In Bali there are many delicacies that you have to try including this famous Nasi Ayam. There are many places where you can savour this dish and each warung (food stall) will have their own variation but the main theme still would be deliciously spicy chicken dishes. Make sure you wouldn’t miss this next time you visit paradise island of Bali.
My nasi ayam consists of:
– Steamed white rice
– Jukut Urap (Balinese Vegetable Salad with Coconut Dressing)
– Telor Pindang (Boiled Marbled Egg)
– Tum Ayam (Balinese Steamed Chicken in Banana Leaves)
– Ayam Pelalah (Balinese Spicy Shredded Chicken)
– Siap Mesanten (Chicken in Coconut Milk Sauce)
– Sambal Matah (Balinese Raw Sambal)
– Kacang Goreng (Fried Peanuts)
I have indeed posted all the other recipes except Siap Mesanten and Telor Pindang, if you would like to find out the other recipes, just click on the link above.
This Siap Mesanten recipe came from my best friend in Indonesia. We have known each other since the 1st grade of SMP (Junior High School), and yes it’s been a long time. As I write this I remember all the memories, all the ups and downs we’ve passed through together. Now she is a mom with two beautiful daughtesr as well a super great home cook especially with Balinese dishes. Yes I miss her dearly (and her cooking too) ^^
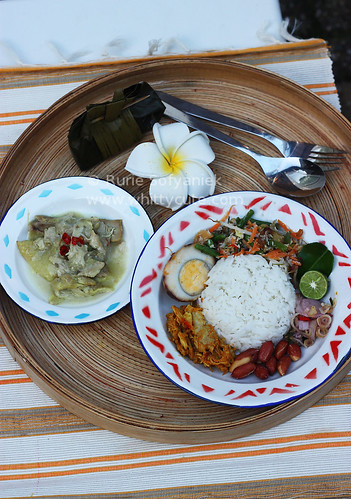
Siap Mesanten
Ingredients:
– 300gr chicken pieces
Base siap:
– 2 cloves garlic, bruised
– 2 cm turmeric, bruised
– 1/2 tsp salt
– Sprinkle of sugar
Base Kele:
– 1 tsp black pepper
– 3 cloves garlic
– 1 cm lesser galangal
– 2 cloves candlenuts
– 2 lime leaves
– 2 salam leaves
– 1 lemongrass, bruised
– Sambal Embe
– 200 ml thick coconut milk
– 2 tsp vegetable oil
Directions:
– Boil chicken pieces base siap and enough water to cover the chicken pieces until done, set it aside
– Pound Base kele ingredients until smooth except the leaves and lemongrass.
– Heat vegetable oil in a pan and fry pound spices until fragrant and done.
– Pour thick coconut and let it boil. Add chicken pieces with some of the broth.
– Let it cooked until done, adjust the taste.
– Serve with sambal embe.
Telor Pindang
Ingredients:
– 6 eggs
– 1 daun jati (teak leaves) (I didn’t have these instead I used 4 black tea bags)
– 2 tbsp shallots skin
– 1 galangal, bruised
– 2 salam leaves
– 1 lemongrass, bruised
– 1 tbsp salt
– Sprinkled of sugar
Directions:
– In a deep pan placed all ingredients along with enough waters to cover the eggs.
– Boil for 15 minutes until the eggs is hard, take the egss one by one while continue cooking. Tap the egg gently on a surface until it cracked but the skin still intact with the egg, return to the pan.
– Continue cooking with low fire for 1 hour until water has evaporated, peeled and ready to eat.
If you are a beginner in baking, I think one thing that you should learn first is how to bake muffin. It contains no difficult technique, just mix and bake 🙂 This one is a variation I made from Blueberry Muffin
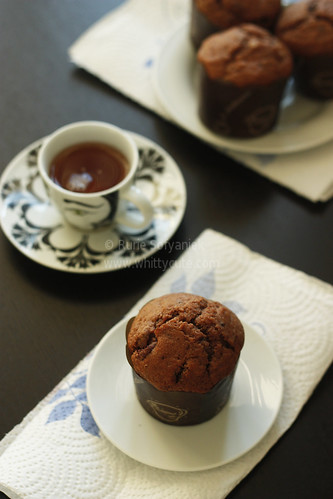
Makes 1 dozen muffins
1. Start the batter
Position a rack in the center of the oven and heat the oven to 350 degree F. Lightly oil (or spray with cooking spray) the top of a standard 12-cup muffin tins (cup should be 2 3/4 inches across and about 1 inch deep) and line with paper or foil baking cups
1 pound (3 1/2 cups) unbleached all-purpose flour
4 teaspoons baking powder
1/2 teaspoon baking soda
1/2 teaspoon table salt
1 1/3 cup granulated sugar
5 ounces (10 tablespoons) unsalted butter, melted and cooled slightly
1 cup whole milk, at room temperature
1 cup creme fraiche or sour cream, at room temperature (I used sour cream while other time I used yoghurt and it worked beautifully)
2 large eggs, at room temperature
1 large egg yolk, at room temperature
In a large mixing bowl, sift together the flour, baking powder, baking soda, and salt; mix well. In a medium mixing bowl, whisk together the sugar, butter, milk, creme fraiche or sour cream, eggs, and egg yolk until well combined.
Pour the wet ingredients into the dry, and fold gently with a rubber spatula just until the dry ingredients are mostly moistened (the batter will be lumpy)—there should still be quite a few streaks of dry flour.
2. Add your choice of flavorings, fruits, chocolate, and nuts (in my case chopped milk chocolate, do visit her blog to see other possibilities).
3. Fill the tin and bake the muffins
Use an ice cream scoop if you have one with a “sweeper” in it; otherwise, use two spoons to spoon the batter into the muffin cups, distributing all of the batter evenly. The batter should mound higher than the rim of the cups by about 3/4 inch. Bake until the muffins are golden brown and spring back lightly when you press the middle, 30 to 35 minutes. (The muffin tops will probably meld together.) Let the tin coll on a rack for 15 to 20 minutes.
Source: Eliza Adam
|
Awards
 My First Award, Thank You!
Whittycute Foodie Event
 Click here to see the round up!
|


![masakbareng[1]](../../wp-content/uploads/masakbareng15-150x150.png)


![masakbareng[1]](../../wp-content/uploads/masakbareng14-150x150.png)


