|
|
They say always use the best quality cooking chocolate you can afford to achieve the best result in making brownies. But the thing is dark cooking chocolate here is so darn expensive and I tried couple of times making brownies with a really good brand like Callebaut and Lindt but why oh why I found they were too bitter to my taste buds. Was it just me or what? I used to use Colatta dark cooking chocolate back home and it was totally fine. It seems that dark cooking chocolate here contains more cocoa than back home? Anyone got answer? I guess I’m just so used to product I used back home that when I got the chance to use other type of product my tongue refused it 😛 But hey that’s also okay, it means I didn’t have to break the bank just to make a loaf of brownies.
Oh and for your information this brownies I made with supermarket brand milk cooking chocolate, precisely the Albert Heijn (AH) merk. AH you should thank me for a free commercial 😛 The price was lets say 1/4 of the branded chocolate but it was better for my taste buds.
Verdict: one of the best brownies I made ever. Thanks to Ning Rachmah for sharing the recipe.
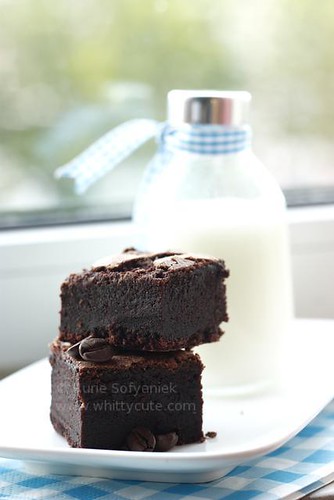
Ingredients:
– 230 gr good quality plain chocolate melted(I used AH milk chocolate)
– 115 gr butter
– 300 gr caster sugar (I used 250gr)
– 5 large free range eggs, lightly beaten
– 4 tablespoons, strong espresso coffee, room temperature (I used 8 tbs)
– 70 gr plain flour
– 70 gr cocoa powder, plus extra for dusting
Directions:
– Beat butter and sugar until smooth.
– Whisked eggs lightly just until they are well mixed, add whipped butter and sugar with the eggs. Mix well, add espresso coffee.
– Sieve dry ingredients; flour and cocoa powder. Add into the batter, mix well.
– Add melted cooking chocolate, mix well.
– Grease a square baking pan 20x20x4cm with butter and lightly dust with cocoa powder.
– Pour batter and bake in preheated oven 160Celcius for 35-45 minutes until brownies in done.
Source: Brownies by Linda Collister through Rachmah Setyawati

Waaa, it’s time again for KBB challenge….and what is funny, this time it’s onbijtkoek aka breakfast cake 😛 I never made this cake before because obvious reason that it’s available everywhere here but also because I don’t really like Dutch style ontbijtkoek, I like the Indonesian’s version better. If you ask me why, maybe it’s just my personal opinion but Dutch ontbijtkoek doesn’t have the “bite”, the taste is too flat compared to Indonesian’s one. Indonesian’s one got more spice flavour …..or maybe it’s just because I’m Indonesian 😉
For this challenge, I didn’t modify any ingredients because I wanted to see how would the cake turned out. And luckily I have all the ground spices so no need to buy anything extra for this challenge. Only there was no kenari (Javanese almond) available here, so I just used the normal almond. Even no baking powder or emulsifier needed. Though I did change the last bit of the step, I didn’t wait for 20 minutes to add the almond instead I just added right from the start. Because from my experiences after 20 minutes the cake surface would be dry already therefore no almond would stick 😛 The end result was nice bouncy cake though it was a bit dry but it was expected, and we ate it just like the Dutch would eat it here, with slab of butter/margarine. In texture it was lighter and bouncier than the Dutch version. All in all it was a really easy cake to make, economic one also and taste wise it was approved by a real Dutch men 😉 as I quote here “it tasted better that shop bought ontbijtkoek” het was lekker toch schatie ^_*
So sorry for the step by step pictures, you might wonder whatever happened with after all the ingredients were in the bowl then suddenly mixing was finish. Where were the middle processing….It was a long story but short version was, after the second picture, the card was full I used another one but that one was broken and I lost some pictures including the middle process of baking :s
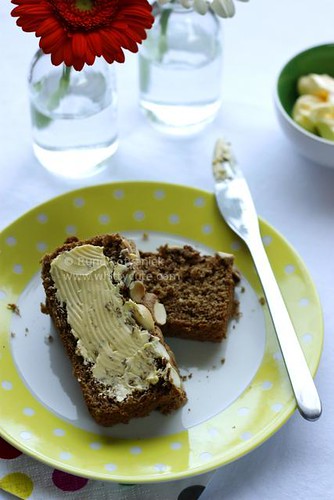
Ingredients:
– 125 gr palm sugar– 5 egg yolks
– 3 egg whites– 125 gr flour
– 1 tsp ground cinnamon– 1/2 tsp ground nutmeg– 1/4 tsp ground cloves
– 50 gr kenari (I used almond) Directions:– Sift together cinnamon, nutmeg, cloves and wheat flour. Set aside. Directions:– Sift together cinnamon, nutmeg, cloves and wheat flour. Set aside.
– Beat egg yolks, egg whites and palm sugar until thick and frothing.
– Add the sifted ingredients and stir well
– Pour into a loaf baking pan lined with grease-proof paper that has been brushed with butter and sprinkled with flour.– Bake at 160C for about 20 minutes until half-done. Sprinkle with almond slices, continue baking for another 20 minutes until it is done. (I didn’t do it like this, instead I added almond right from the start of baking time)
Source: Book of Kue Kue Indonesia by Yasa Boga

I couldn’t help but drool when I saw this cheesecake from this pretty pregnant lady ^_* I thought, I have to make it, have to, no excuse! That’s the thing of being foodie blogger, everyday you see food posts from your foodie blogger friends and you drool in front of your screen uncontrollably. I bet this happens to all of us foodie blogger.
Back to the cheesecake, I read somewhere but I forgot where, that if you baked cheesecake with au-bain marie technique it will lighten the texture. I did so with my cheesecake, it tasted perfect but as I never tasted cheesecake baked without au-bain marie technique before so I didn’t know the differences between those two.
I didn’t know whether it was my own fault or what but I ended up needing twice ingredients for the cheesecake base. First I did just like the recipe said, but it covered only half of my baking tin. Was it because I was using a 20cm round baking pan and not the square one as the recipe suggested? I also made orange lemon instead of cherry. I didn’t have cherry at the time and I love orange lemon a lot so I thought why not? But the rest I followed the recipe and Dita’s suggestions. It tasted so good, creamy yet fresh with a tang from the orange lemon, definitely a keeper.
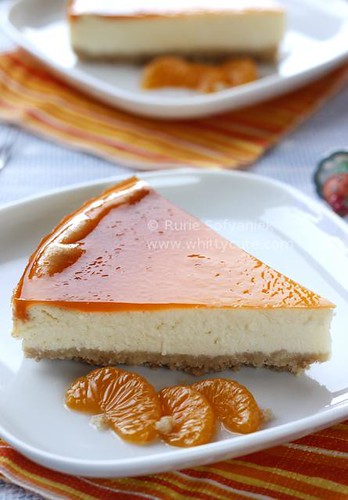
Ingredients:
– 6 Honey Maid Honey Grahams, crushed (about 1 cup) (I used regular biscuit marie but I ended up using 2 cups)
– 3 tbs sugar (I used 6 tbs)
– 3 tbs butter or margarine, melted (I used 6 tbs)
– 5 pkg (8 oz. each) Philadephia Cream Cheese, softened (I used 2 pkg = 370gr)
– 1 tbs vanilla (I used 1 tsp)
– 4 eggs
– 1.5 tsp lemon zest
– 2 tbs lemon juice
– 1 can mandarine orange
Directions:
– Heat oven to 325°F (160C).
– Mix crumbs, sugar and butter; press onto bottom of 13×9-inch pan. Bake 10 min.
– Meanwhile beat cream cheese, 1 cup sugar, flour, lemon zest, lemon juice and vanilla with mixer until well blended. Add sour cream; mix well. Add eggs, 1 at a time, mixing on low speed after each just until blended. Pour over crust.
– Bake 40 min. or until center is almost set. (Mine was 1 hour) Cool completely. Top with orange glaze. Refrigerate 4 hours.
– Serve with mandarine orange on the side.
Orange glaze:– 150 ml orange juice – 2 sheets gelatine
– Melt gelatine according to the package.
– Mix well with orange juice.
– Pour over baked cheese cake and refrigerate.
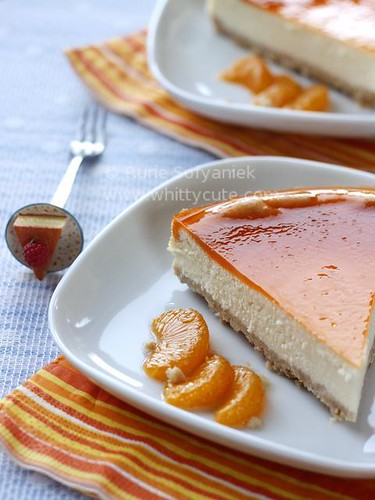
Source: Philadelphia through Dita
In Holland, when it’s your birthday then you have to do “trakteren” (traktir in Indonesian 😉 or treat in English) your colleagues at work. Usually the birthday boy/girl would bring cakes as a form of “trakteren”. But because last Friday was masbul birthday but that day he wasn’t at work since it was “harpitnas” (Thursday April 30th was Queen’s Day), so tomorrow he is going to bring cakes.
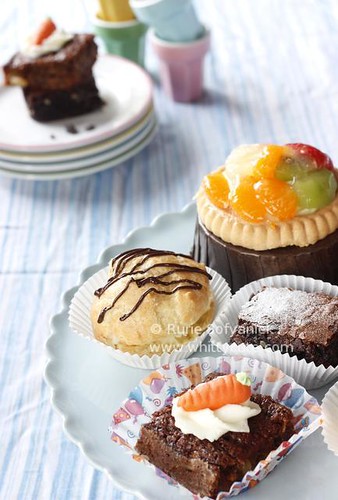
I decided to make my own cakes and to proof that I am crazy I decided to make 4 kinds of cakes :p , no not alone, I’m not that crazy. I baked with my friend Iin the whole Sunday afternoon. It’s so much fun to bake with company as you can share jokes, update about our life and of course gossip :p Thank you In for helping me with all the cakes 😉
The 4 kinds of cakes were; Kue Soes Isi Vla, Carrot Pineapple Cake, Mini Fruit Pie and Brownies. I have made the kue soes isi vla and carrot pineapple cake before so you could follow the link to find out the recipes. As for the mini fruit pie, I cheated on the most important part which was the pastry :p I bought ready made pasrty shell then filled it with Napoleon Vla, topped it with fruit and glazed it with clear jelly.
But what I’m going to share with you is this amazing brownies…..it was just so heavenly good. The top was nicely dry and cracked like rice field in the dry summer months. The inside was nicely fudgy, chocolatey and gooey just like a proper brownies should be. I got the recipe in one of my recipe book collection. Bake by Rachel Allen, a famous chef from UK.
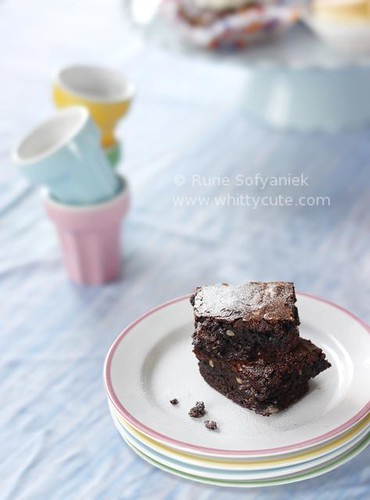
Makes 16 pieces
Ingredients:
– 175 gr dark cooking chocolate (use best quality you can afford as this will determined the taste of your brownies)
– 175 gr butter
– 25 gr good quality cocoa powder
– 3 eggs
– 225 gr caster or soft brown sugar (I used 175 gr)
– 1 tsp vanilla extract
– 100 gr plain flour
– 75 gr hazelnut, toasted skinned and roughly chopped
– Icing sugar and cocoa powder for dusting (optional)
Directions:
– Preheat oven to 180Celcius. Line the base and sides of a cake tin (20x20cm) with baking paper.
– Melt the chocolate, butter and cocoa powder together in a heatproof bowl set over a saucepan of simmering water. Do not lete the base of the bowl touch the water. Remove from the heat. (I did this part in the microwave 😉 )
– In a separate bowl, whisk the eggs, sugar and vanilla extract for 2 minutes. Continuing to whisk, add the chocolate mixture until well combined. Sift in the flour through with the hazelnuts with a spatula or metal spoon.
– Spoon the mixture into the prepared tin and bake in the oven for 19-25 minutes. Allow to cool in the tin, then cut into squares.
– Dust with icing sugar and cocoa powder (optional)
Source: Bake by Rachel Allen
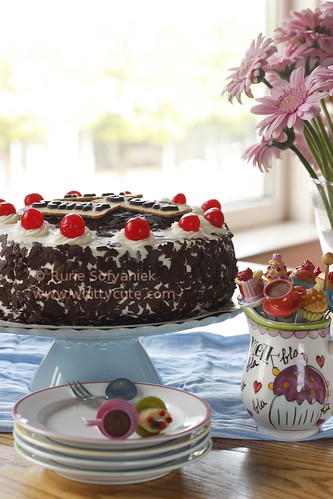
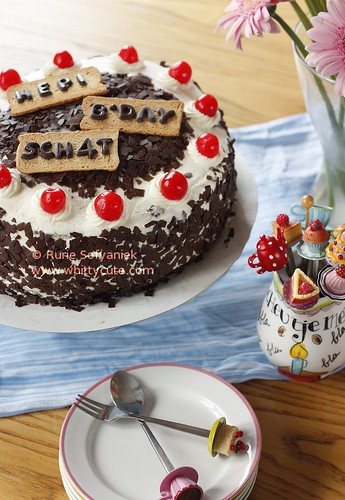
I made this cake for masbul’s B’day today. But I was feeling rather experimental (or lazy) so I didn’t make my own sponge cake as usual, but I was using ready made sponge cake mix. I was sceptical with that product at first but the result turned out to be nice, soft and moist sponge cake, bouncy and not too sweet.
For the rest of the decorations, I just used what I had in hand. Cherry with stem was not available so I just make do with cherry without stem. Then I used ready made chocolate curls which I had difficulty in sticking them onto the cake. Tried to sprinkle it by just throwing it on the side surface, but more chocolate curls on the floor than on the cake. Tried to stick it to my hand then transfer it onto the cake, but then some of the whip cream would stick on my hand. Anyone has better idea on how to do it easily? On the other hand what nice was the cherry filling, I didn’t have to thicken it myself because here they’ve got cherry pie filling in the can 🙂
Gefeliciteerd met jou verjaardag schatie 🙂
For 12 persons
Ingredients:
Sponge cake
– 1 ready made chocolate sponge cake mix (I used PrimaMix or used your own favorite chocolate sponge cake recipe)
– Prepare sponge cake according to the package
Simple syrup
– 100ml cherry water or water
– 50gr sugar (usually it’s 1:1 scale of water and sugar but I don’t really like it too sweet)
– 50ml rhum (optional)
– Boil cherry water or water with sugar.
– Let it cool down then add rhum
Whip cream
– 750 ml fresh cream
– 4 tbs sugar
– Put the whisk and bowl for whipping the cream in the freezer for 30 minutes or more.
– Whisk the cream for 2 minutes then add sugar, continue whisking until hard peak.
Other ingredients
– 300 gr chocolate curls
– 12 Maraschino cherry
– 1 can cherry pie filling
Finishing:
– Divide cake into 3 parts and sprinkle with simple syrup.
– Spread thick layer of whipping cream on the lowest part of the cake, add 1/2 can of the cherry pie filling, top with the second part of the cake.
– Repeat process one more time.
– Spread remaining whipped cream on the surface of the cake, reserved a little bit of whipped cream enough for the swirls on top.
– Decorate with chocolate curls and Maraschino cherry.
– Chill until served.
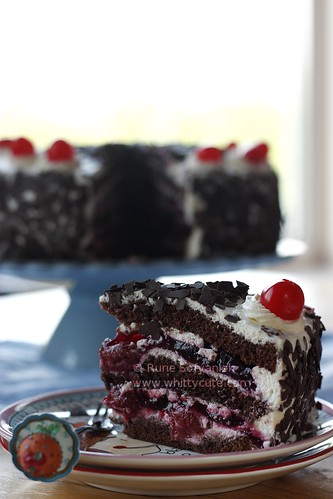
Got no exact source for this as I’ve been making this over the years and adjust ingredients here and there according to my taste and what’s available but as you all know this cake came from Germany 😉
I couldn’t control myself anymore after seeing Mb. Ienas post of her kue soes. My mouth started to drool uncontrollably which lead me to a final decision that I had to make this! But I decided to use recipe from my recipe book to practice it otherwise I got nice books and I just let them to dust in the corner of my bookcase 😛 And the result was really good.
Later when I compared to Mb. Ienas recipe, they were not so difference in terms of quantities of the ingredients etc. But I did follow her footstep in adding more corn flour as the custard filling was way too runny.
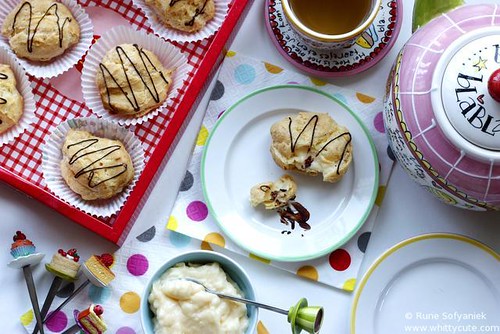
Makes easily 30 pcs
Kue Soes
Ingredients:
– 100 gr butter
– 250 ml water
– 150 gr flour
– 1/2 tsp salt
– 4 eggs (I used 3 large eggs)
Directions:
– Preheat oven 200-210C, line cookie sheet with baking paper.
– Boiled the water with butter and salt until all butter has dissolved, low the fire. Add flour, mix well with wooden spoon.
– Wait for couple minutes until the batter is luke warm, add egg one by one while mixing it until smooth with either wooden spoon or electric mixer.
– Use piping bag and pastry tip (a Wilton 1M will do beautifully) to pipe the batter or use 2 spoons to shape. Give +/- 3 cm distance in between.
– Bake for 20 minutes or until its golden brown. Cool on a wire rack.
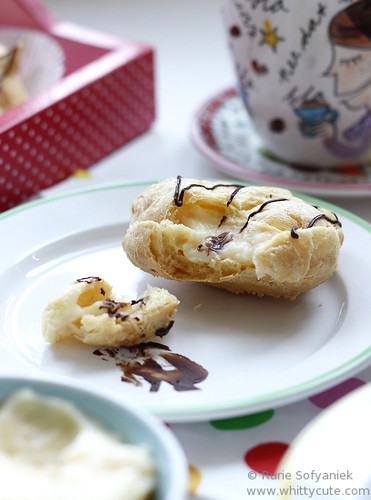
Napoleon Vla
(This is 1/2 recipe from the original recipe)
Ingredients:
– 400 ml milk
– 100 gr sugar (I used 60 gr)
– 2 egg yolk
– 25 gr corn flour (I used 50 gr)
– 1 tbs butter
– 50 ml whip cream
– 3 tbs rhum/brandy
Directions:
– Dissolved corn flour with a little bit of milk, set aside. Mix egg yolk with little bit of milk, set aside.
– Boiled the rest of the milk with sugar in low fire. While keep stirring add corn flour mixture, egg yolk mixture. Mix until smooth, add whip cream, let it boiled once more. Add butter and mix throughly until the custard is shiny.
– Remove from the fire and continue stirring until hot steam has dissapeared. Add rhum/brandy.
Source: Book Cake and Pastry by YasaBoga

Since I landed my eyes on KBB (Klub Berani Baking) which was founded by Mbak Arfi, I badly wanted to join because I love baking and a baking club would be sufficient to learn more things about baking. After some months of waiting finally my first KBB challenge.
At first I was a bit confuse, what do you suppose to do with caramel pots and shortbread sticks but I flicked into the milis and got lots of pencerahan. Special thanks to Ningku sing paling ayu dewe Rachmah Setyawati ^_*
I made this with hardly any difficulties, thanks to all the tips and tricks from all the KBB’ers. Just that when I made the caramel my hands were itching to stir the sugar but pfiuh I took a hold on myself and didn’t do it. My caramel pots took double time in the oven than expected which was 30minutes. Then came the shortbread sticks, I cut the sugar amount down to 50% since again some tips said so and boy was I glad I did that otherwise the taste would be far too sweet for my taste buds. I also used 12 mint leaves but somehow the tasted wasn’t as minty as I I expected. When I wanted to rolled the dough, it stick to the surface and the rolling pin, but I put the dough for some hours in the fridge and voila my problem solved.
All in all it wasn’t that crazily difficult, pfiuh. I liked the caramel pots because I like everything caramel, the shortbread sticks melted in your mouth. Thanks for the hosts; Dita and Lina for hosting this challenge.
Recipe:
Minted Shortbread Sticks

– 100g icing sugar (I used 50gr)
– 200g flour
– 100g cornflour
– 250g unsalted butter, softened
– 1 vanilla pod, seeds removed and reserved
– 1 sprig mint, chopped (I used 12 leaves)
Preheat the oven to 150C. Line a baking tray with baking paper.
Combine the icing sugar, flours, butter, vanilla seeds and mint in a bowl and mix well. Roll out to about 1cm thick. Cut into 2 x 8cm fingers. Place on the prepared tray and bake for 20-25 minutes, until lightly golden. Cool and store in an airtight container until required. Makes about 30.
Caramel Pots

– 125g caster sugar
– 2 Tbs water
– 125ml milk
– 250ml cream
– 3 egg yolks
Whisk the sugar into the water in a saucepan. Heat carefully and cook to a golden caramel. Combine milk and cre
am in a separate saucepan and warm-do not boil. Whisk the milk into the caramel. Cool slightly.
Beat the egg yolks, until creamy. Gradually pour the hot caramel onto the egg yolks, mixing well.
Pour into four ramekins. Bake in a water bath at 160C for 30 minutes or until set. Remove the ramekin, cool then chill. Serves 4.

Source: Chef Fred Wiesehutter, Heritage Christchurch, posted at Foodtown Magazine
Some photos and recipes from my and also my friend Eni birthday brunch.

Whitty the cat guarding (or rather eyeing 😛 ) the food. There were some food that I cooked for the brunch. The day before I made the chicken feet and the chicken topping for the mie ayam (chicken noodle). Then me, Iin and Frisda made the cakes, fruit punch, fried wantan, sambal, boiled quail eggs, pickle etc. On the day Eni brought lumpia (spring roll) and Thata brought steamed brownies (I’m sorry Tha I forgot to take picture of your yummy moist brownies…mau lagi donk buat dipoto 😀 )

Some of the party goers 😛 from l to r; Eni, Olivia, Hesti, Thata, Iin, Frisda and me sitting on the floor. Ohya ini sekalian kopdar ama Thata…and she immediately got new nickname 😛 “mbak 18thn” because she looked boy oh so young despite her real 2* (censored) age. 😛

For this mie ayam (chicken noodle) recipe just follow here.

For this pangsit goreng (fried wantan) recipe just follow here.

This one is from Eni and here is her recipe
Lumpia Ayam Bihun Sayuran (Vegetable Rice Vermicelli Chicken Spring Roll)
Ingredients:
– Mini lumpia skin
– 1/2 package of mixed vegetable (spring onion, white cabbage, carrot, bean sprout)
– 100 gr rice vermicelli soaked in hot water
– 350 gr chicken breast minced
– 1/2 tbs coriander powder
– 3 garlic mashed
– 1 tbs oyster sauce
– 1 tbs gember siroop (you can use 2cm ginger bruised)
– Salt
– Pepper
– 1 white egg
– Oil for deep frying
Directions:
– Heat oil in a pan, add garlic and stir until fragrant.
– Add minced chicken, stir until turns color.
– Add mixed vegetable and stir until vegetable is wilted.
– Add coriander, oyster sauce, gember siroop (ginger), salt and pepper.
– Heat through until all ingredients are cooked, turn off fire.
– Assemble the lumpia and use the egg white to seal the lumpia.
– Deep fry in hot oil until golden brown.
– Serve with lumpia sauce.
Source: Eni

Ceker Ayam Kecap (Chicken Feet in Sweet Soy Sauce)
The dish that we Indonesian said hurray…..and the Dutch said eeeew…How different culture also have different appreciation on food 😀
The method and recipe is basically the same with the mie ayam topping but first I deep fry the chicken feet until golden brown then soak them in cold ice water for overnight so they were nice and plump. Furthermore I added mushroom soy sauce.

This is again Yongki Sponge Cake 🙂 my favorite, but this time is one recipe. I ordered the edible print in Cake Print. Then with the help of Iin with rolling the fondant voila….a cake 🙂

Finally I got the chance to try the famous TCCC (Triple Choco Caramel Cake) by Teh Uceu. But I couldn’t make it as pretty as hers…and somehow my cake was a bit dense like brownies. Is it suppose to be like that? But the taste was so good….I can still remember the chocolatey caramelly taste…oh forgive my weird vocabulary.
TCCC (Triple Choco Caramel Cake)
Ingredients:
Cake
– 10 eggs
– 150gr sugar (I used 80gr)
– 1 tbs emulsifier (tbm)
– 140 gr flour
– 60 gr cocoa powder
– 75 gr dark cooking chocolate (DCC), chopped
– 100 gr butter
Directions:
– Melt butter in a double boiler (or microwave), add DCC, mix well, set aside.
– Whisk eggs with sugar until half fluffy, add emulsifier and continue whisking until white and fluffy.
– Carefully add flour into the batter.
– Add the melted butter and DCC, mix well.
– Brush square or round baking pan with butter and sprinkle flour evenly.
– Pour batter in the baking pan and bake in a preheated oven of 170C until done.
Chocolate Ganache
– 500 ml fresh cream
– 500 g dark cooking chocolate (DCC), coarsely chopped
– 75 g butter
Directions:
– Heat fresh cream in a pan with low fire but do not let it to boil.
– Add DCC and butter, mix well.
– Put in the fridge for couple of hours until ready to be used.
Caramel syrup
– 100 gr sugar
– 50 ml water (1)
– 100 ml water (2)
Directions:
– Cook sugar with water (1) in a low fire until it turns into caramel.
– Add water (2) into the caramel mixture, continue cooking until caramel has melted and well mixed. Set aside.
Decorations:
– Canned or fresh fruit; kiwi, mandarin, strawberry etc.
– Clear jelly mixture to brush on top of the fruit.
Assemble:
– Sliced cake into two equal parts.
– Brush caramel syrup onto the surface of the cake.
– Spread some chocolate ganache on the centre surface (about 1 cm thickness), top with the other part of the cake.
– Spread the rest of the chocolate ganache evenly on the surface of the cake.
– Decorate as your desire with the fruits.
Source: Teh Uceu

Then after making sponge cake you would get lots of egg whites…it’s time to make this one 🙂 made only from egg whites.
Kue Zebra Pandan Kukus (Steamed Zebra Pandan Cake)
Ingredients:
– 260 gr egg whites
– 1/4 tsp salt
– 1.5 tsp emulsifier (tbm)
– 50 ml water
– 125 gr sugar (I used 95gr)
– 125 gr cake flour
– 15 gr powdered milk
– 1/2 tsp baking powder
– 30 gr melted butter
– 1 tbs condensed milk
– 1/4 tsp vanilla essence
– 1/2 tsp pandan paste
Directions:
– Whisk egg whites, salt, emulsifier and water until half fluffy.
– Add sugar bit by bit while whisking until white and fluffy.
– Add flour, powdered milk and baking powder.
– Add melted butter, condensed milk, vanilla escence .
– Take 1/2 batter and add pandan paste, mix well.
– In one spot pour the batter alternately in a baking pan (I used 7 muffin mould).
– Steam in a preheated steamer for 15 minutes until done.
Tips:
– To yield a pretty zebra pattern, do pour the batter consistenly in one same spot.
Source: Book of Variasi Kue Lapis Sederhana Sampai yang Rumit – Sedap through Deetha.

And for the last one inspired from Deetha 🙂 it was real good, refreshing, highly recomended.
Fruit Punch
Ingredients:
– 1 can rambutan
– 1 can jack fruit
– 1 can young coconut
– 2 kiwis cut
– 1 box strawberry cut
– 2 cans mandarine
– 1 mango cut
– 1 tsp selasih seed, soak in hot water until it’s fluffy
– 1.5 litre of white soda
– 1 litre of fresh orange juice
– Ice cube
Directions:
– Mix everything in a big bowl.
Tips: you can use all kinds of seasonal fruits.
Inspired by: Deetha

Again fondant cake…

I made this for one of my friend’s mother birthday, Tante Marietta.
It’s amazing what you could find over the internet. It always has answer to all your questions. I googled how to make fondant sofa on youtube and voila I came across a really useful tutorial about the subject. Though I realize my fondant sofa was not even close to the one on the tutorial :s But at least I learned a thing or two again. Hopefully next time better.
My inspiration: Wilton Celebrate with Fondant Book, Fondant Sofa 1, Fondant Sofa 2.
I always have something that I wanted to make after looking at Deetha’s blog….like this one also. I clicked to the recipe source, oh it was from a real cake seller, Jeng Melanie. Then it must be good 🙂 Hmm the taste was just very typical Indonesian cake, rich or legit in Indonesian. Thanks Jeng Mel for sharing the recipe.
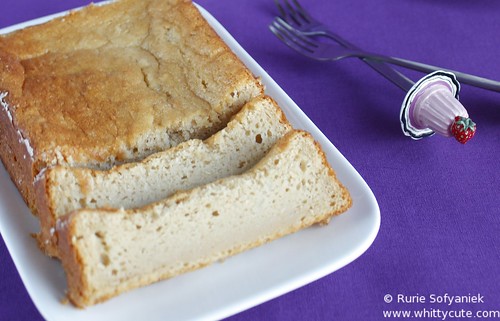
The original recipe called for shredded cheese, so feel free to add it if you prefer.
Ingredients:
– 100 gr margarine, melted
– 200 gr sugar (I used 80 gr)
– 4 eggs
– 50 ml coconut milk
– 500 gr fermented cassava, pound until smooth
– 100 gr flour
Directions:
– Whisk egg and sugar until light and fluffy.
– Slow the mixer speed into 1, add fermented cassava, coconut milk and flour. Mix well.
– Add melted margarine, mix well.
– Pour into a a prepared baking pan, bake in a pre warmed oven 160C until done.
Source: Melanie’s Blog
|
Awards
 My First Award, Thank You!
Whittycute Foodie Event
 Click here to see the round up!
|
 This post is also for this month’s Click Event with the theme “Stacks”


