|
|
Upon my visit back home to Indonesia in the midst of sadness after losing my father I did meet friends. Some of those friends were my fellow Indonesian food blogger whom I never even met before. In Surabaya I met mbak Rachmah, mbak Lia, mbak Tjita, Ces , May and Deetha. Deetha was actully living in Semarang, but she came especially to Surabaya to meet me, ohh how sweet. I also accidentally met Widya, Bu Fat and Riana in Surabaya while I was browsing in a baking supply shop and they were giving baking lesson at the very shop. Then in Jakarta I met Yulia (complete with Kintan and Kinar), Yuli, mbak Ienas, mbak Vania (complete with Patrick and Patricia). Back to Bali I also met the very founder of KBB mbak Arfi (complete with the whole family), then I also briefly met Angel (the lapis legit was really good tapi huaa poto kita nggak sengaja ke delete di harddisk). Though we never met but it was like we have known for years, maybe that’s because we shared the same passion and though we never seen each other face to face but we did interact online whether it’s through our blog, chat or facebook. Oh not forgetting that there was also Haley from Solo whom I didn’t meet because obviously I didn’t go to Solo but she sent me a package of traditional krupuk from her city, terimakasih ya jeng.
Now all their faces are not just merely pretty food pictures they have taken or the beautifully written blog post they have written but they were real person I met in real world. I was honored to have met them in person all the talented Indonesian homemaker, baker, food photographer. I was also touched by all the gestures that my fellow food blogger have made, the effort to spare their time to accompany me, hopefully we would meet again some other time. Who knows it could be in Jakarta, Surabaya, Bali or even in Holland. ^_^

Photo Courtesy of Rachmah Setyawati
@Surabaya With Mbak Rachmah, Deetha and Ces.

@Jakarta With Mbak Ienas, Yuli, Mbak Vania, Yulia and Baby Kinar.

@Bali With Ben, Mbak Arfi, Sarah and Mbak Lenny Pande.

@Surabaya With Tasya, Mae, Ces, My Aunt and who’s that guy on the right 😉

@Surabaya Mbak Rachmah, Mbak Lia, Mbak Tjita

@Surabaya With Riana and Bu Fat.

@Surabaya With Bu Fat and Widya
I usually have some ideas of what to cook in the weekend when I go to the market and decide on what do we want to eat that particular week, but being a spontaneous girl that I am (or at least I tried) I always manage somehow to slip out from my list. Like that day I saw this recipe and I was so intriqued by what Mbak Rachmah has said there, savory, sweet and sour, spicy, how can you say no to food sounds so good like that. I just HAD to try it myself and good that the ingredients were not difficult to find on my pantry and fridge.

Serves 4 persons
Ingredients:
– 1 small package of pickled mustard green, drained and cut into bite sized pieces
– 1 small package of mung bean vermicelli (soaked in hot water and drained)
– 1 egg
– 50 gr minced meat (if you don’t have it on hand, just omit this)
– 2 green chili, sliced
– 5 bird’s eye chili, sliced
– 3 shallots
– 3 garlic
– 2 tbsp kecap manis (Indonesian sweet soy sauce)
– 2 tbsp soy sauce
– 3 tbsp vegetable oil
– Salt
– Sugar
Directions
– Pound shallot and garlic until smooth. Heat oil and fry pounded spice until fragrant.
– Add mincet meat, fry until the meat turned color, add egg.
– Add soy sauce, green chili, bird’s eye chili, fry until the chili are wilted.
– Add pickled green mustard, add salt and sugar, fry with high fire, mix nicely and turn the fire low.
– Add mung bean vermicelli and kecap manis, adjust the taste to your liking.
Source: Rachmah Setyawati

I’ve been away too long, I know. So many things have happened in the past few months. Maybe at some point soon I’m going to tell you the story but as for now spring has sprung in Europe and I’m trying to get back to the normal routine.
Though spring is here, it doesn’t mean that the weather is all warm everyday, just like typical European weather everyday is not the same. So this type of warm sweet porridge for an afternoon snack accompanied with hot jasmine tea (which of course I brought especially from Indonesia). Enjoy.
Want to join MasBar? It’s a monthy Indonesian food blogger event with no string attached whatsoever. All you need to do is cook the food relating to the theme of the month, take a picture of it, post it on your blog and send the picture and short story to us . Do visit our blog here for more information.

For 2 persons
Ingredients:
– 1 cup glutinous black rice (soaked for at least 6 hours, better overnight)
– 100 gr sugar (or as you desired)
– 2 pandan leaves
– 2 liter water
Coconut Milk Sauce:
– 200ml thick coconut milk (I used canned one)
– Pinch of salt
Directions:
– In a saucepan, bring water and glutinous black rice to a boil, stir now and then until the mixture is soft.
– Add sugar and pandan leaves, simmer until it forms porrigde.
– Warm up the coconut milk with pinch of salt.
– Serve the porridge warm with coconut milk sauce.
I have posted this cheese cake like 2 years ago here but have a look there and compare the picture of the cheese cake from that year with this one. Very different eh? It means along the years I did learn a thing or two. Still so much to learn though in Food Photography, however I’m enjoying it so much I barely feel it as learning.

Mix and sift:
– 50 gr flour (all purpose)
– 50 gr cornstarch
Ingredients:
– 60 gr unsalted butter
– 250 gr cream cheese, at room temperature
– 120 ml whipping cream
– 5 egg yolks
– 2 tsp grated lemon rind
– 5 egg whites
– 1/8 tsp salt
– 125 gr castor sugar
– 1 tsp lemon juice
Topping:
– Fresh Strawberries
– White transparant agar-agar or gelatine
– Line the bottom of a round 22cm spring form with baking grease with butter or margarine and sprinkle flour on the surface.
– Heat the oven at 150 degree celcius.
– Put together in a sauce pan: butter, cream cheese and whipping cream. Cook au-bain marie on low heat, stir with a wisk until butter and cream cheese melted and nicely combined.
– Wait until the mixture is not so hot. Mix in flour mixture, blend well. Stir in yolks, blend well. Stir in grated lemon rind, blend well, set aside.
– Beat the egg whites until frothy, beat in sugar and lemon juice gradually while continue beating until it forms soft peaks.
– Spoon 1/3 of egg whites batter into cream cheese mixture, blend well. Fold in this batter to the remaining egg whites batter, blend well. Pour batter into round spring form pan, bake au bain marie (water bath) for approximately 75 minutes until the surface is golden yellow in color, and a tooth pick insert in the cake comes out clean, . Remove from oven, let cool.
– After the cake is completely cooled, transfer cake onto plate. Mix agar-agar or gelatin according to package. Line the straberries on top of the cake, Brush the cake surface with the agar-agar or gelatine mixture, let cool.
Source: 35 Cheesecake Recipes Variation by Yasaboga
 The first KBB for this year with chocolate theme. It’s quiet challenging since there were some severals steps that was needed to be done. First you need to make the cookie dough then refrigerate it for several hours. While you’re waiting you could make the mud cake and ganache. After finishing those two finally you could bake the cookies and assemble them.
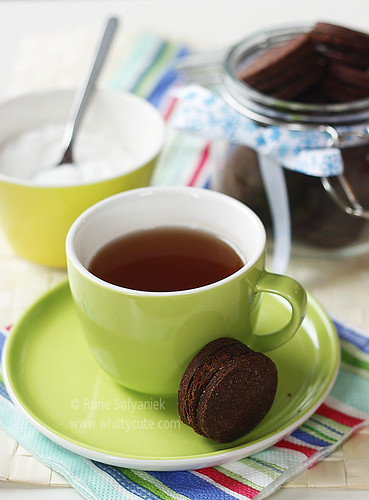
My cookies turned out to be perfect, they didn’t become wide when I baked them. The key to successful cookies making that you shouldn’t whisk the butter and sugar for too long, just enough until they mix for 2-3 minutes. On the other hand the pan size of the mud cake as mentioned by some fellow KBB-ers, needed to be changed to a smaller one indeed. I did just so to avoid the mud cake becoming too dry and thin, but as a result I got a thicker mud cake. It would be ok if the purpose was just for eating but for this the mud cake was meant as a filling between two cookies. Thus the sandwich name. However I found simple solution, just by cutting them first with a cookie cutter with the same size as the cookie and then again slice them horizontally into two. Sandwich between two cookies with ganache as “the glue”, hmm it was a superb cookies I must say (or we must say as there were some people sampling these yummy treats). My husband even say that it was way better than that famous chocolate cookies sandwich (you must know which famouse cookies sandwich he meant ^_* )
So don’t be discouraged by the long title and process, it was simply worth it.

Makes 24 (Mine yielded way more than this since I cut them 5 cm)
Cookies
– 250g butter, softened
– 330g firmly packed brown sugar (I reduced to 260 gr)
– 2 eggs
– 450g plain flour (I reduced to 400 g)
– 75g self-raising flour
– 50g cocoa powder
– 2 Tbs cocoa powder, extra
– Beat butter, sugar and eggs in small bowl with electric mixer until combined.
– Transfer mixture to large bowl; stir in sifted flours and cocoa, in two batches.
– Knead dough on floured surface until smooth; divide in half, roll each portion between sheets of baking paper until 5mm thick.
– Cover; refrigerate 30 minutes. (I refrigerated longer, approx 1 hour)
Chocolate Mud Cake
– 150g butter, chopped
– 100g dark eating chocolate, chopped coarsely
– 220g caster sugar (I reduced to 180 g)
– 125ml water
– 2 Tbs coffee liqueur
– 150g plain flour
– 2 Tbs cocoa powder
– 2 egg yolks
– Combine butter, chocolate, sugar, the water and liqueur in small saucepan. Stir over low heat until smooth.
– Place mixture in medium bowl; cool 10 minutes. Whisk in sifted flour and cocoa, then egg yolks. Bake about 25 minutes.
– Cool cakes in pans. Using 6.5cm round cutter, (I used 5cm cookie cutter) cut 12 rounds from each cake.
Chocolate Ganache
– 80ml cream
– 200g dark eating chocolate, chopped coarsely
– Bring cream to a boil in small saucepan; remove from heat.
– Add chocolate; stir until smooth. Refrigerate until spreadable.
Finishing
– Preheat oven to 170C/150C fan-forced. Grease two 20cm x 30cm lamington pans (I used 22 cm x 22 cm pan); line with a strip of baking paper, extending paper 2cm above edges of pans.
– Make chocolate mud cake. (I sliced the mud cake into two pieces after cutting them with 5 cm cookie cutter)
– Make chocolate ganache.
– Preheat oven to 180C/160C fan-forced. Grease oven trays; line with baking paper.
– Using 6.5cm round cutter (I used 5cm cookie cutter), cut 48 rounds from the cookie dough. Place about 3cm apart on oven trays. Bake about 12 minutes. Cool on wire racks.
– Spread ganache onto underside of cookies; sandwich a mud cake round between two cookies.
– Using heart template, dust cookies with extra cocoa.
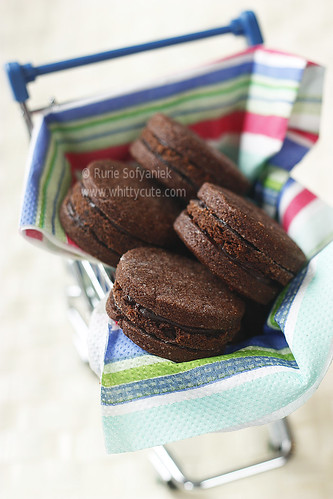
PS: Since I took the photo the day after I made it (due to lack of the sun in winter), I completely forgotten about the dusting the cookie with heart template, so forgive me.
Source: The Australian Women’s Weekly: cupcakes, cheesecake, cookies. ACP Magazine Ltd. 2008


We couldn’t deny that snacking is a part of Indonesian eating culture. We like to snack in between meals, either would it be mid morning, mid afternoon or late at night. Therefore we can find snack vendors easily across the country. There are just so many kinds to suit your mood, from sweet pisang goreng (banana fritters), savoury bakwan goreng (vegetable fritters) to sweet and spicy rujak buah (mixed fruit with sweet and spicy sauce). With around 230 millions people to feed everyday we could be sure that there are enough choices to please every appetite.
You can find those street vendors selling yummy food 24/7. The so called street vendor is just a name, you could actually find them in many places. They could be either on the market, on the side of a street, in front of a closed shop late at night or even in front of your doorstep. How could one has a street vendor in front of his door step if you should ask? It’s because there are also various kind of ways to sell it ie; in a permanent space or with a cart pushed by the seller then he would make his way around the neighborhood.
Since there are none of those food street vendors in this place (I mean not the Indonesian kind) I had to make it myself. One of my favourite snack of all time would be this Pempek Palembang or Mpek Mpek Palembang or Empek Empek Palembang. I first tasted it years and years ago in a local food court in Bali and yes I immediately liked the taste. It is made basically from sago flour, tenggiri fish fillet (spanish mackerel) then served with sweet and spicy sauce made primarily made from tamarind, palm sugar and bird’s eye chili. The savory taste of the fish cake marry nicely with the sweet, tangy yet spicy sauce. It’s seriously heaven.
This post is my contribution to this month’s Masbar with the theme Panganan Kaki Lima (Food ala Street Vendor). If you would like to participate in our event, there is still time until next week, please do visit our blog for more information.
But if you ask again why we named street vendor as kaki lima? Kaki lima literally means five legs, and those vendors with the cart usually has three legs on their cart and the other two legs would be the legs of the seller. Funny eh?
The recipe below belongs to dear blogger friend Mbak Ine Sena, I have tried some other recipes but so far hers is the best, thank you ya Mbak for sharing the recipe with us.

For the fish cake
Ingredients:
– 200 gr spanish mackerel fillet
– 150gr sago flour (I used tapioca flour)
– 1 tbsp tang mien flour
– 125 ml ice water
– 2 cloves of garlic, smoothly pound
– 2 tsp salt
– 3 tsp sugar
Directions:
– Grind the fish fillet, spices and 50 ml ice water with food processor until it forms lumps.
– Add the rest of the ice water, keep pulsing until the mixture mixs well.
– Add tapioca and tang mien flour, continue pulsing until smooth.
– Shape the fish paste as you like
Cuko
Ingredients:
– 200 gr palm sugar
– 600 ml water
– 25 gr tamarind
– 1 tbsp preserved cabbage (tong cai)
– 5 bird’s eye chili, sliced
– 5 cloves of garlic, lightly broken with a pestle
– 1/2 tsp salt
– 2 tbsp Indonesian sweet soy sauce (I omitted this)
Directions:
– Boil water with palm sugar, tamarind and preserve cabbage until boiled. Keep boiling for around 15 minutes, drained. You can add more water if you prefer.
– Boil again, add garlic and chili, add the rest of the ingredients. Continue boiling until the taste of all the ingredients is absorbed in the sauce.
– Taste and adjust to your own palate.
Note: If you live abroad where spanish mackerel is difficult to find you could replace it with white fish fillet such as; cod or pollack but however the best fish to use is still spanish mackerel.
Source: Ine Sena, Mpek Mpek and Cuko
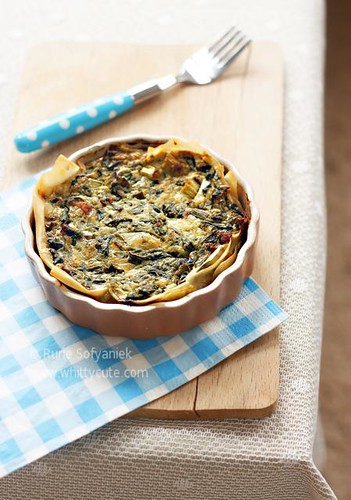
 Everytime I found a recipe that I thought was interesting and worth to try I always always managed to change them whether it’s slightly or radically. Like this recipe, it supposed to contain squash served on the side but since I was not a fan of squash and lazy to do it I just omitted it. Besides that there were also some other ingredients that I replaced with something else or completely removed. For the original recipe, just click on the link. Everytime I found a recipe that I thought was interesting and worth to try I always always managed to change them whether it’s slightly or radically. Like this recipe, it supposed to contain squash served on the side but since I was not a fan of squash and lazy to do it I just omitted it. Besides that there were also some other ingredients that I replaced with something else or completely removed. For the original recipe, just click on the link.
But all in all my “creativity” paid off, an easy quick yet satisfying meal. And since the food didn’t look that bad to look at, I thought we could also take it to a party or pot luck party, therefore this is my contribution for this month’s Masbar, a virtual pot luck party for Indonesian food blogger. If you would like to join us, do click here
Ingredients:
– 3 eggs, beaten
– 250g tub ricotta (I used garlic cream cheese)
– 200g frozen leaf spinach , defrosted, squeezed dry and chopped
– 1 spring onion , finely sliced
– ½ a 145g tub fresh basil pesto
– ½ a 240g pack SunBlush tomatoes in oil, roughly chopped (omitted)
– 270g pack filo pastry
– knob of butter , melted
Directions:
– Mix together the eggs and ricotta (garlic cream cheese), then add the spinach, spring onion and pesto.
– Heat oven to 180C/160C fan/gas 4. Unwrap the pastry and cover with a just-damp piece of kitchen paper.
– Brush the butter mixture over 1 sheet of pastry, then place in a 23cm tart tin. Brush another piece of pastry with butter and place slightly further around the tin. Keep brushing and lining the tin (keeping the pastry covered when not using) until you have used up the pack and the tin is completely covered. Trim away any pastry overhanging the edges of the tin, then bake for 5-10 mins until starting to crisp. Spoon the spinach mixture into the tin and scatter with the tomatoes. Cook for 20-25 mins moreuntil the tart is set.
Source: www.bbcgoodfood.com
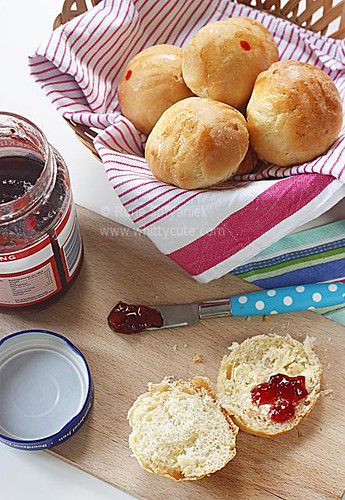
 The first time I read the recipe for this month’s challenge, I cringed. I thought, err what is BSP (Baker’s Percentage). It didn’t look like any normal bread recipe at all. But after consulting the milis, read the article etc, I sort of get what it means. But I really couldn’t explain much, if you like you could go ahead here and have a good reading yourselves. The first time I read the recipe for this month’s challenge, I cringed. I thought, err what is BSP (Baker’s Percentage). It didn’t look like any normal bread recipe at all. But after consulting the milis, read the article etc, I sort of get what it means. But I really couldn’t explain much, if you like you could go ahead here and have a good reading yourselves.What I’m going to share now would be the whole bread making process. I did just as the formula suggested, just reduced the sugar to half amount as I read on the milis that if you put all amount of sugar your bread would be way too sweet, and I didn’t like overly too sweet bread. I also reduced the amount of salt as I felt it was a bit tad too much for my taste.
As I have done many times of kneading bread (or pizza) with barehands many times before, I made this bread with my mixer. It took 15 minutes on speed 3 until the dough passed window pane test. This test I would never know if it wasn’t for KBB, There’s always new things I learned every challenge. If you are wondering what is it all about, just read it here.
Oh I almost forgot one thing, the egg in the recipe called for 38.5 gr which means less than one egg, so as advised on the milis that you could use the whole egg but then you should compensate the other liquid you use which was water. So I did just that, used up the whole egg (60 gr) then reduced the amount of water by 21.5 gr.
Now it’s winter time in Europe but dough likes warm spot in order for them to rise. At first I put my dough on top of the heating, and it worked ok. But then on the second fermentation I put them inside the oven with very low temperature (30celcius). I moved the poor dough because the cats had been eyeing on them since the first time I put it on top of the heating. Other things that I was not sure about was the fermentation time, there were many versions in the explanation and milis. But in the end it came to a conclusion that you shouldn’t let your dough rise twice it’s starting size because then it would be what we call “over fermentation”. So mine was; first fermentation 1.5 hours and second fermentation 45 minutes.
I was a little bit creative actually with the filling, but sorry forgot to take picture of the roti isi (filled rolls). Besides plain dinner rolls I also made some rolls with filling; chocolate, milk and spicy hot tuna. Next time I make this bread I would surely take pictures. My bread turned out beautifully, just 15 minutes in the oven.
And what surprised me the most that after 2 days (I kept some to eat and test the next days) it was still soft and moist. As I made bread before both with and without bread improver this bread was really good for a bread that has got no added chemical besides the yeast itself. YAY to KBB for founding this recipe, another new baking knowledge!
Recipe based on the baker’s percentage:
– 500 gr bread flour
– 9 gr salt (I used 5 gr)
– 38.5 gr granulated sugar (I used 20 gr)
– 31 gr powdered milk (dried milk solid)
– 5 gr instant yeast
– 38.5 gr egg, slightly beaten at room temperature (I used one whole egg 60 gr)
– 38.5 gr butter, room temperature
– 314 gr water (I used 292.5 gr)

Directions:
– Mix together the flour, salt, powdered milk, sugar and yeast in a 4
quart bowl (or in the bowl of an electric mixer). Pour in the egg, butter and water and mix with a large metal spoon (or on low speed of the electric mixer with the paddle attachement) until all the flour is absorbed and the dough forms a ball. If the dough seems very stiff and dry, trickle in more water until the dough is soft and supple.
– Sprinkle flour on the counter, transfer the dough to the counter, and begin kneading (or mix on medium speed with the dough hook), adding more flour, if necessary, to create a dough that is soft, supple, and tacky but not sticky. Continue kneading (or mixing) for 6 to 8 minutes. (if the electric mixer, the dough should be clear the side of the bowl but stick ever so slightly to the bottom.) The dough should pass the windowpan
e test and register 80oF. Lightly oil a large bowl and transfer the dough to the bowl, rolling it to coat it with oil. Cover the bowl with plastic wrap.
– Ferment at room temperature for 1.5 to 2 hours, or until the dough doubles in size (the length of time will depend on the room temperature).
– Remove the fermented dough from the bowl and divide it in half for sandwich loaves, into eighteen 2-ounce pieces for dinner rolls, or twelve 3-ounce pieces for burger or hot dog buns. Shape the pieces into boules for loaves or tight rounds for dinner rolls or buns. Mist the dough lightly with spray oil and cover with a towel or plastic wrap. Allow to res for about 20 minutes.
– Shaping. For loaves, shape like rolling a Swiss roll but pinch the crease with each rotation to strengthen the surface tension. Pinch the final seam closed with the back edge of your hand or with your thumbs. Lightly oil two 8.5 by 4.5-inch loaf pans and place the loaves in the pans. For rolls and buns, line 2 sheet pans with baking parchment. Rolls require no further shaping. For hot dog buns, shape into a pistolet without tapering the ends. Transfer the rolls or buns to the sheet pans.
– Mist the tops of the dough with spray oil and loosely cover with plastic wrap or a towel. Proof the dough at room temperature for 60 to 90 minutes, or until nearly doubles in size.
– Preheat the oven to 350oF for loaves or 400oF for rolls and buns. Brush the rolls or buns with the egg wash and garnish with poppy or sesame seeds. Sandwich loaves also may be washed and garnished, or score them down the centre and rub a little vegetable oil into the slit.
– Bake the rolls or buns for approximately 15 minutes, or until they are golden brown and register just above 180oF in the centre. Bake loaves for 35 to 45 minutes, rotating 180 degrees halfway through for even baking, if needed. The tops should be golden brown and the sides, when removed from the pan, should be golden. The internal temperature of the loaves should be close to 190oF, and the loaves should sound hollow when thumped on the bottom.
– Cooling. When the loaves have finished baking, remove them immediately from the pans and cool on a wire rack for at least 1 hour before slicing or serving. Rolls should cool for at least 15 minutes on a rack before serving.

 Yay it’s one of my favorite food as the theme of this month’s MasBar. I couldn’t eat seafood often in Holland, apart from some types of fishes, seafood are quite pricey. But just the other day I discovered cheap prawns and seafood at the deep-freeze section of the Asian supermarket. However the thing is, they came in a 1 kg box and I couldn’t separate them apart. I got no other choice but to thaw them all and cook them all at once. So I ended up with two kinds of prawn dishes and no one to eat them but me because my better half didn’t like prawns. Uh oh problem again. But I got clever (if I may say so) solution for that. I divided the dish into separate one person portion, and freeze them. So whenever I got I-have-to-eat-prawns-now-no-matter-what moment, I could thaw my treasure from the freezer. Yay it’s one of my favorite food as the theme of this month’s MasBar. I couldn’t eat seafood often in Holland, apart from some types of fishes, seafood are quite pricey. But just the other day I discovered cheap prawns and seafood at the deep-freeze section of the Asian supermarket. However the thing is, they came in a 1 kg box and I couldn’t separate them apart. I got no other choice but to thaw them all and cook them all at once. So I ended up with two kinds of prawn dishes and no one to eat them but me because my better half didn’t like prawns. Uh oh problem again. But I got clever (if I may say so) solution for that. I divided the dish into separate one person portion, and freeze them. So whenever I got I-have-to-eat-prawns-now-no-matter-what moment, I could thaw my treasure from the freezer.
This sate dish is real easy and fast to make, inspired by those beach side seafood cafe in Jimbaran, Bali. Though it would be nicer if you could marinate the prawns overnight in the refrigerator before grilling them. Don’t forget your hot steaming rice and sambal kecap (or any other sambal of your choice).
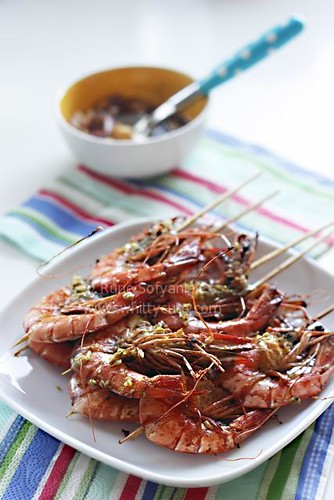
Serve 5 persons
Ingredients:
– 500gr prawns, head peeled and deveined (though I didn’t devein them, lazy T.T)
– 1 lime
– 8 garlic
– 8 cm turmeric, peeled
– 4 candlenut, panbroil
– 1 tsp coriander
– 2 cm ginger
– Salt
– Pepper
– Some vegetable oil
Directions:
– Squeeze lime juice over prawns and set aside for 30 minutes, drained.
– Grind garlic, turmeric, candlenut, coriander, ginger, salt and pepper until smooth, mix with little bit of vegetable oil.
– Smear over prawn and marinate overnight.
– Arrange prawn on the sate skewers and grill each side until done.
– Serve warm with sambal kecap.
Sambal kecap:
– 4 bird’s eye chili (less or more depending on your taste buds), sliced
– 1 shallot, chopped coarsely
– 1/4 tomato, chopped coarsely
– Some lime juice
– Some kecap manis (Indonesian sweet soy sauce)
– Some kecap asin (soy sauce)
Source: Me
One of my comfort food ever, I could eat it for breakfast, lunch, dinner or in between meals. Especially in this winter weather, nothing beats hot meal after a cold day out. I once made another version here but this time let’s make this one with yellow chicken broth. That’s one advantages of porridge, it’s so versatile you could dress it to whatever you feel like it.
On the other hand, if you haven’t visit my other blog. And yes you would ask, what’s the use of other blog? Well the think is this is a food blog and I (we) need another place for everyday blurps, nonsense story about the cats etc. So yes do visit here.
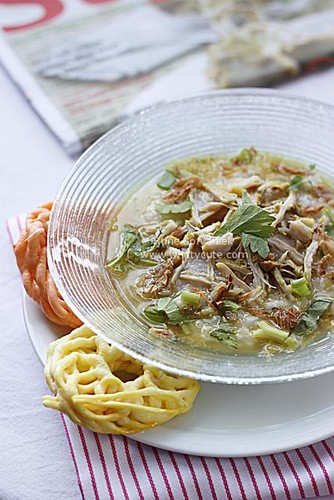
Serves 8 persons
Ingredients:
– 300 gr rice
– 3 ltr water
– 4 salam leaves
– 2 tsp salt
– 2 tbs vegetable oil
– 700 gr chicken
– kecap manis
– 2 stalks spring onion, finely sliced
– 2 stalks Asian celery, finely sliced
– Fried onion
– Krupuk/emping
Spice paste:
– 12 shallots
– 5 garlic
– 3 cm turmeric
– 2 tsp coriander, panbroil
– 5 candlenuts, panbroil
– 1/2 tsp peppercorns
For the yellow chicken broth:
– 1.5 ltr chicken broth
– 2 tsp salt
– Some pinch of ground nutmeg
Directions:
– Cook the rice, water and salam leaves until soft and turned into porridge. If rice hasn’t turn into porridge, add more hot water and continue cooking and stirring.
– Boil chicken until soft, set aside the broth. When it’s not so hot anymore, fried the chicken until golden brown and shred.
– Make the yellow chicken broth; heat vegetable oil, saute spice paste with nutmeg and salt until fragrant. Add chicken broth, mix well and continue cooking until boiling, season.
– Serve porridge with chicken broth, add kecap manis, shredded chicken, sliced spring onion, Asian celery, fried onion, krupuk/emping and sambal.
Source: Tabloid Nova
|
Awards
 My First Award, Thank You!
Whittycute Foodie Event
 Click here to see the round up!
|


