Archives

KBB #32 - Japanese Roll Cake

First time I saw the book of Junko’s at Mbak R’s house, I thought how on earth could you make that. Then I saw it again on her blog. She never failed to amaze me again and again. And I can sense her contribution in this month’s challenge because all of a sudden we have to make this. But if it’s not because I had to I don’t think I would make it. Was already threatened by the complicated look of it. At first when reading the recipe, immediately gotten a headache. Needed more than 3 times to read the recipe to finally get where everything goes and when.

The cake was typical Asian cake, very moist and soft. Somehow I find the filling of whipped cream and mandarine oranges complemented the taste and texture of the cake. Will I make it again? If it was not that complicated I might. Hehehe.

 Ingredients:

Batter 1:
– 4 egg yolks
– 40 gr caster sugar
– 40 ml oil
– 60 gr water
– 80 gr all-purpose flour

Batter 2:
– 60 gr (from +/- 2 eggs) egg whites
– 15 gr caster sugar
– 10 gr cornstarch

Batter 3:
– 160-175 (from 5-6 eggs) egg whites
– 0.5 gr salt (I used 1/4 tsp)
– 50 gr caster sugar
– 1 tsp lemon juice
– 15 gr cornstarch

– I added 2 tsp lemon gel in the batter for flavouring

– Food colouring(s)

– 2 9×9 baking pans (22,5cm)
– thickened cream (and/or nutella, cake crumbs, sliced fruits, canned fruits, etc.) for filling

Directions:

1. Cut two 9×9 greaseproof paper and draw patterns on each of them. (I didn’t do this, I just did it free handedly). Lightly grease the baking pans, then place the greaseproof paper on the baking pan. Then lightly grease the greaseproof paper. Preheat oven to 165-175C.

2. Prepare batter 1: in a medium or large bowl, beat together yolks and sugar on high speed until thick and pale. Add oil and beat on medium-low speed until blended. With the mixer still on medium-low, add water and mix thoroughly. Lastly, add flour and mix until just combined.

3. Rinse beaters and prepare batter 2: Beat egg whites and caster sugar until soft peaks form. Add cornstarch and beat until mixed throughly.

4. Add 5-6 Tbsp of batter 1 into batter 2. Add food colouring, or divide batters into any number of colours you wish to use and colour them differently. Then start painting on your greaseproof paper. Place painted pan in the freezer.

5. Prepare batter 3: beat egg whites, salt, caster sugar, and lemon juice until soft peak forms. Mix in cornstarch.Mix batter 3 with remaining of batter 1. If you want to colour the cake, add in food colouring now. Mix with a metal spoon a few times to lighten the batter, then add the rest of batter 3. Mix lightly until just combined.

6. Take pan out of freezer. Pour batter and spread evenly. Bake 20-25 minutes or until toothpick test comes out clean. Cool on pan for 5 minutes, then invert onto another baking paper. Peel baking paper and discard.

7. When the cake has cooled, prepare filling. I used whipped cream with mandarine oranges. Spread filling evenly, then roll, using the baking paper as guide. Serve.

KBB#27 : (Failed) Fortune Cookies


Don’t tell me you’re never wanted to put your on fortune whenever you eat this at your favourite Chinese place? Well now you can make it in your own kitchen and feel free to make any kind of fortune you want. Although pay good attention to the direction because I didn’t that’s why mine was rather thick which resulted I couldn’t fold them nicely. And when I did fold them they sort of crack….oh well it all made up with the taste, they surely tasted very nice. Good luck in making them.


Prep Time: 15 minutes

Cook Time: 15 minutes

Total Time: 30 minutes

Ingredients:
– 2 large egg whites
– 1/2 teaspoon pure vanilla extract
– 1/2 teaspoon pure almond extract
– 3 tablespoons vegetable oil
– 8 tablespoons all-purpose flour
– 1 1/2 teaspoons cornstarch
– 1/4 teaspoon salt
– 8 tablespoons granulated sugar
– 3 teaspoons water

Preparation:
– Write fortunes on pieces of paper that are 3 1/2 inches long and 1/2 inch wide. Preheat oven to 300 degrees Fahrenheit. Grease 2 9-X-13 inch baking sheets.
– In a medium bowl, lightly beat the egg white, vanilla extract, almond extract and vegetable oil until frothy, but not stiff.
– Sift the flour, cornstarch, salt and sugar into a separate bowl. Stir the water into the flour mixture.
– Add the flour into the egg white mixture and stir until you have a smooth batter. The batter should not be runny, but should drop easily off a wooden spoon.

Note: if you want to dye the fortune cookies, add the food coloring at this point, stirring it into the batter. For example, I used 1/2 teaspoon green food coloring to make green fortune cookies.

– Place level tablespoons of batter onto the cookie sheet, spacing them at least 3 inches apart. Gently tilt the baking sheet back and forth and from side to side so that each tablespoon of batter forms into a circle 4 inches in diameter.
– Bake until the outer 1/2-inch of each cookie turns golden brown and they are easy to remove from the baking sheet with a spatula (14 – 15 minutes).
– Working quickly, remove the cookie with a spatula and flip it over in your hand. Place a fortune in the middle of a cookie. To form the fortune cookie shape, fold the cookie in half, then gently pull the edges downward over the rim of a glass, wooden spoon or the edge of a muffin tin. Place the finished cookie in the cup of the muffin tin so that it keeps its shape. Continue with the rest of the cookies

Source : www.chinesefood.about.com

Season's Greetings

KBB#26 : Panettone

Christmas is (almost) here. Time goes by so quickly when you’re having fun isn’t it. This assignment from KBB came right on time for christmas baking. The not so sweet bread with it’s rich texture added from the chopped peel and sultanas give pleasant taste despite the somewhat chewy texture. I would say that you should savour this Italian bread along with some butter spread on your christmas morning.

Ingredients:

– 1 1/2 cakes of fresh baker’s yeast (I used instant yeast 1 sachet 11 gr)

– 65 ml (1/4 cup) sugar

– 6 tbsp. warm water – 6 egg yolks

– Finely grated zest of 1 lemon

– A pinch of salt

– 500-750 ml (2-3 cups) flour (I used all purpose flour)

– 100 ml (6 tbsp.) diced candied peel

– 100 g (6 tbsp.) + 2 tbsp.butter

– 4 tbsp. sultanas

– 4 tbsp. currants (Didn’t use this)

– 1 tsp. vanilla


Directions:

– Sprinkle 1 tbsp. granulated sugar and the yeast over the warm milk and let sit 3 minutes; mix and let rest in a warm draft-free place (e.g., a warm oven that has been turned off) until the mixture has doubled in volume, approximately 5 minutes.

– Pour the mixture into a bowl, add in the egg yolks, vanilla, lemon zest, salt and remaining sugar; gradually mix in 500 ml (2 c.) of the flour by hand until a smooth consistency is attained – the dough should easily come together into a ball.

– Gradually add the butter cut into small dice and beat until the dough becomes smoother and more elastic; add 125 to 250 ml (1/2 to 1 c.) more flour until the dough is firm and silky but not sticky; place the ball onto a lightly floured surface. Knead the dough for approximately 10 minutes. When the dough is smooth and shiny, place into a buttered bowl; dust lightly with flour, cover with a kitchen towel and place in a warm draft-free place for about 45 minutes until doubled in volume.

– Punch down the dough firmly with your fist and flatten it out in the bowl; add the candied lemon peel, raisins and currants and knead until well distributed but without working the dough more than necessary; line a large bread pan with brown paper that has been well buttered on both sides; place the dough in the pan and trace a cross on top; – Cover with buttered paper and let rise again in a warm place for 15 minutes; remove the paper from the top; brush the top with softened butter.


Baking :

– Preheat the oven to 200°C (400° F)

– Place the bread pan on the middle rack of the oven and bake for 10 minutes

– Reduce the oven temperature to 160° C (350° F) and continue baking for another 30 to 40 minutes, brushing again with melted butter; the bread is done when the surface is golden and crispy

– Remove from the oven; remove the paper and let cool for 15 minutes before unmolding.

Source : The World Wide Gourmet

Kbb#25 : Scones


My lovely online baking club, Klub Berani Baking is having it’s 4th birthday, time surely flies when you are having fun. Felt that it was just yesterday when we celebrated it’s 3rd birthday. Anyway this year is my 3rd year joining the club and although sometimes I struggle to meet the deadlines (blush) but I still enjoy it, the challenges, the togetherness, the chit chat amongst members. Happy Birthday dear KBB, here to many more years to come! And to celebrate it let’s savour this lovely scones with cream and jam and not forgetting tea with milk and sugar. Cheers!

These scones were easy peasy to make. Before making them without having read the recipe I bought eggs because I assumed one would always need eggs for baking. But it turned out I didn’t need it at all. Total 30 minutes from gathering the ingredients, mixing the dough and baking, tada I got 12 lovely buttery scones. I reckon you should try it as well. Then perhaps you would feel as if you were dining like a royal with the Queen herself. 😉

Ingredients:

  • 3 cups plain flour
  • 6 teaspoons baking powder
  • 1/4 teaspoon salt
  • 75 g butter
  • 1 -1 1/2 cup milk
  • extra milk

Directions:

  • Sift flour, baking powder and salt into a bowl.
  • Cut butter in until it resembles fine breadcrumbs.
  • Add milk and mix quickly with a knife to a soft dough.
  • Knead a few times.
  • Lightly dust an oven tray with flour.
  • Press scone dough out onto this.
  • Cut into 12 even-sized pieces.
  • Leave a 2 cm space between scones.
  • Brush tops with milk.
  • Bake at 220C for 10 minutes or until golden brown.


  • Source : Edmonds Cookery Book

    Winner of the Giveaways!

    Remember this blogpost some times ago? Now its time to announce the winner. First I put numbers on the entries and used random.org to pick out the lucky winners. Congrats to the winner and hopefully until next giveaways!


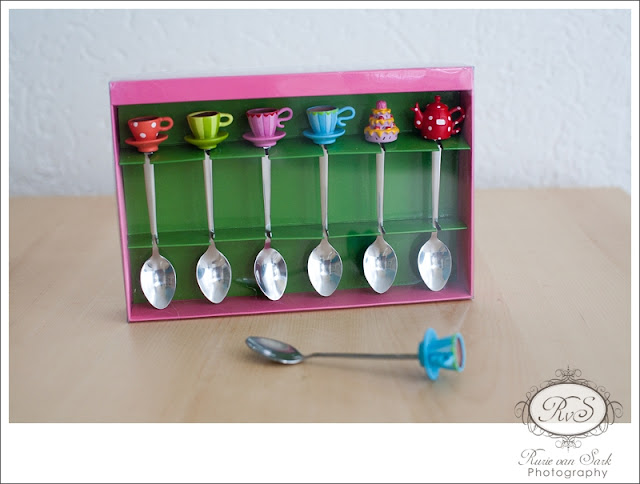
    Winner for this pretty teaspoon set is Wulan from Yummy Mommy Diary.


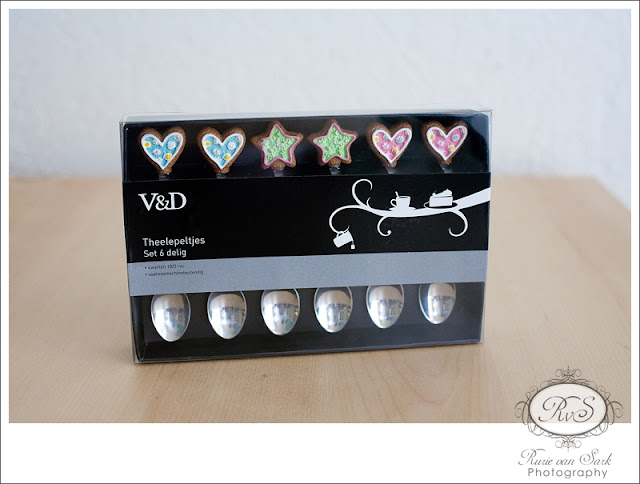
    The lucky one who gets to have this equally cute tea spoon is Nony from Te Onilie Flavour.


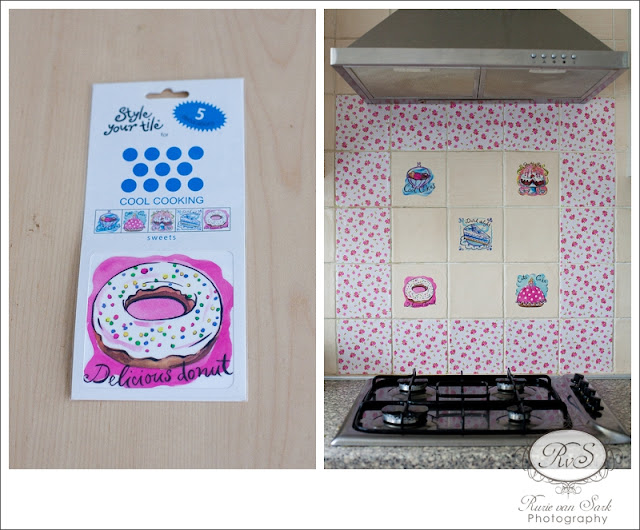
    And Ria from Icip-Icip di Dapur is ready to make her kitchen looks prettier with this ceramic stickers.


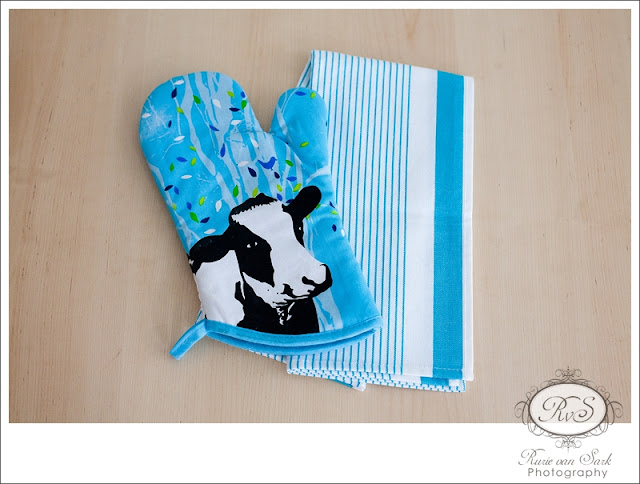
    Last but not least, Buncis from Buku Catatan Resep gets to win these two, blue oven mitt and tea towel.


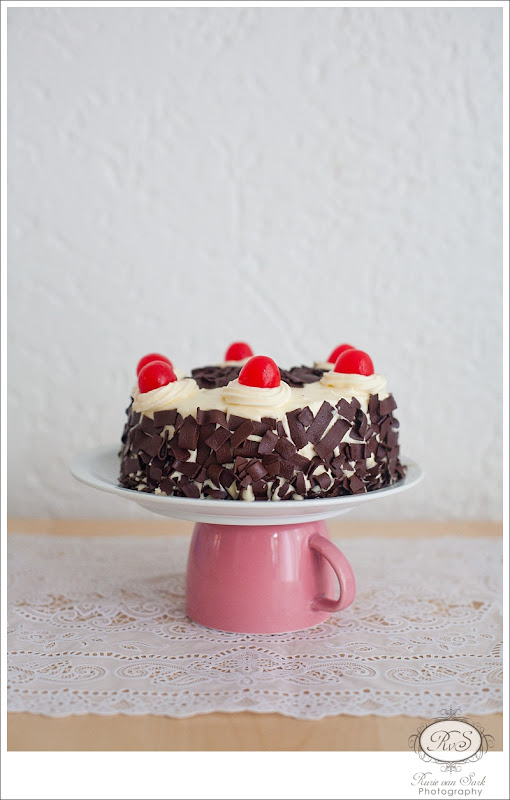
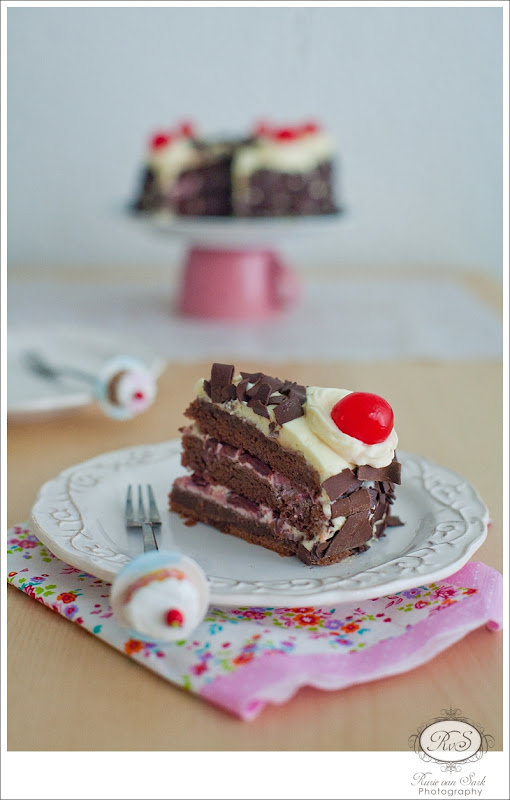
    Black Forest Cake : Celebration Cake


    Black forest cake has been one of my favourite cake since forever. I remember when I was small, my adopted American grandmother would some times treat us to a special 5 star hotel bakery. Occasion like that didn’t come often, only came with birthday or special celebration. Back then the tasted resembled nothing I ever had, you could taste chocolate, cherry, sweet rhum all at the same time. Not forgetting the pretty presentation. There we were, in our best clothes at a 5 star hotel surrounded by ‘high class’ baked goods, everything looked nice and classy and we felt very special that day. A sweet memory that I still cherish until now.

    Now I am able to make my own I don’t forget about this cake, it is still my favourite and this time I made it specially for Masbar‘s 3rd birthday and my very own blog 4th birthday. Happy birthday to both of us!


    Recipe: do click here.

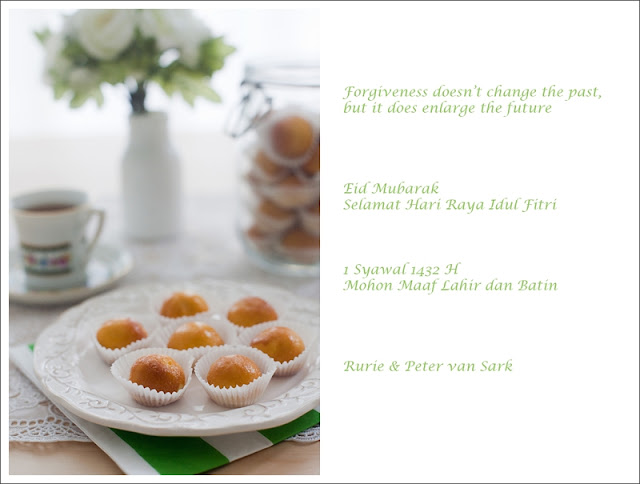
    Eid Mubarak 1432H

    Four Years of This Blog & Things I Like Giveaways

    From 4 years until now. Left: 4 years ago. Right: couple weeks ago.

    For English do scroll down.

    Bulan Juli musim panas empat tahun lalu, liburan musim panas yang panjang dan belom tau mau ngapain. Bengong di depan komputer, pengen masak sesuatu yang Indonesia tapi nggak tau musti masak apa dan gimana cara masaknya.

    Browsing sana sini, nemulah blognya Bunda Inong. Bahasanya yang lugas, masakannya yang sepertinya mudah dibikin, ceritanya yang lucu-lucu bikin tambah tertarik dan browsing nyambung ke blog blio yang ini. Tambah jatuh cinta baca cerita tentang anak-anaknya, dan walo sibuk mengurus anak tetep sempat blogging, masak, ngasih kursus, jualan kue n berteman.
    Aku kagum dan terinspirasi dengan blio. Cuma penasaran juga kok blognya hanya berakhir sampai Agustus 2006. Browsing kesana kemari ternyata Bunda Inong sudah meninggal September 2006. Tapi blognya masih sering dikunjungi teman-teman virtualnya.

    Dari blog Bunda Inong, aku ketemu blog-blog lain dan di akhir hari memutuskan kok sepertinya seru juga kalo punya blog, belajar masak, ketemu teman-teman baru, n ada yang baca atau nggak yang penting tulis aja. Ya memang inspirasi pertamaku adalah Bunda Inong. Bunda, kita semua tau pasti sekarang blio sudah bahagia disana, terimakasih ya untuk inspirasinya.

    Nah sekarang empat tahun kemudian kita makan-makan, eh salah. Sebenernya sih ini ultah blog bulan Juli lalu tapi berhubung lupa *tepok jidat. Yawes lah kan kata pepatah lebih baik terlambat daripada nggak sama sekali. Ada bagi-bagi hadiah denk. Nggak 1 hadiah aja tapi 4 (empat) loh, 4 benda yang aku suka dan pakai sendiri di foto-fotoku ataupun sehari-hari di rumah.

    Seru kan, caranya gimana donk? 
    Caranya gampang banget kok.

    1. Like pageku yang ini dan ini.

    2. Kalau udah, tinggalkan komentar di post ini, posting apa aja yang ingin kalian liat di blog aku in the future? 
    Dan kenapa kalian pengen menangin hadiahnya?.

    3. Jangan lupa tinggalin nama dan link ke blog kalian kalau ada.

    4. Udah tinggal tunggu aja dua minggu lagi apakah kalian menang atau nggak.

    Gampang kan. Yuk tunggu apalagi.


    In English

    Long summer holiday 4 years ago and I didn’t have any plan yet. I was staring in front of my computer itching of something Indonesian to cook but I didn’t know what and how.

    I browsed here and there until I found this blog by Bunda Inong. Her story telling captivated me, her foods made me drool and it helped that she was funny as well. Her kitchen led me to her personal daily blog which was equally amusing. I couldn’t stop reading all her stories about her children and eventhough she was busy taking care of her family she still had time for blogging, friendship, giving baking course, cooking and selling her baked goods.
    I was amazed with her energy, to say the least I was inspired. Although one thing was bothering me as why both her blogs stopped at August 2006. I browsed some more until I found out that she had died that following month, September 2006. But her blog was still alive and you can see that she was much loved by her friends.

    Her blogs led me to other cooking and baking blog and at the end of the day I decided to create a blog like hers, to learn cooking, meet new friends and not caring whether anyone would read your blog, just write it. Yes Bunda Inong was my first inspiration. Bunda, I know that you are happy over there, I thank you for all the inspiration.

    Now four years forward I’m having a giveaways. Although the blog anniversary was last month but they all say better late than never. I have not only 1 but 4 (FOUR) things that I like to use in my photos and also daily at home.

    How to enter?
    Read on it’s really easy.

    1. Do like my pages here and here.

    2. When you have done so, leave two comments in this post.
    What sort of blogpost you would like to see more in my blogs in the future? And why you want the gift sooo bad?

    3. Don’t forget to leave your name and link to your blog if available.

    4. Wait for 2 weeks whether you are the winner or not. So easy peasy.

    Allright what are you waiting for?


    You can win one of these 4 things I love!


    Sendok teh lucu ini muncul di banyak foto-foto aku, dan aku tau banyak teman-teman yang suka juga kan.

    These teaspoons are so famous you could see it in many of my photos. And I know many of you love it too.


    Sendok teh yang sama lucunya.

    Equally cute teaspoons 😀


    Stiker untuk tegel, gampang dipasang dan diremove. Seperti kalian liat di dapur aku.

    Cute tile stickers, easy to apply and remove. Just like you see in my kitchen.


    Yang ini Belanda banget and biru. Sarung oven gambar sapi dan serbet dapur.

    And something blue and Dutch. Cow print oven mitt and tea towel.

    Belajar Home Food Photography Yuk

    Buat teman-teman di Belanda dan sekitarnya yang ingin belajar bagaimana caranya memotret makanan di rumah tanpa dengan peralatan yang ada, yuk ikutan les singkatnya. Buat yang ingin ikutan, silakan langsung kirim email ya.

    Informasi ini juga bisa dilihat di photoblog.