|
|
This traditional Indonesian cookie was unheard of until now 🙂 our online baking club decided to showcase this kept treasure to the rest of the world, and that we do together with other online club NCC. Having never heard nor tasted the cookie I couldn’t imagine what the taste would like though I have heard from other friends who have tried it that it was indeed a melt-in-your-mouth kinda cookie. I was intriqued, so here we are my first bangket.
I did add more butter (didn’t have margarine so I used butter) to the dough as my dough didn’t hold itself. It was more like a heap of flour I couldn’t mold at all. At. All. After adding more butter it was allright. Friends in Indonesia used special mold for this but I didn’t have any. Though in Holland we do have the same type of mold for making speculaas, but it’s ok I didn’t have it so instead I used mini muffin silicon mold. It worked perfectly fine. Later that night some friends came over and tasted the cookies. They say the cookies looked like candy but tasted like cookies.
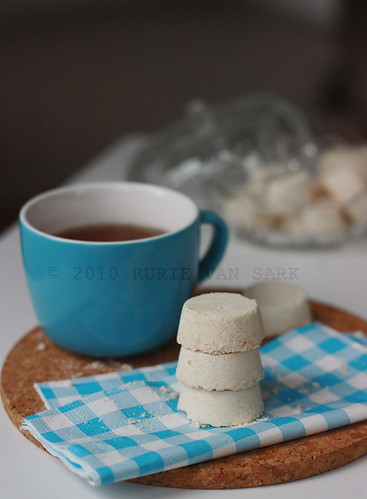
Bangket Susu (Milk Bangket)
Ingredients:
– 500 gr tapioca flour
– 100 gr margarine (I used butter and added some more later on)
– 150 gr powder sugar (was way too sweet for my own tastebuds, will reduce later)
– 75 gr condensed milk
– 2 pandan leaves

Directions:
– Pan broil the flour with pandan leaves until light, set aside to cold.
– Mix everything by hand
– Mold with kue satu mold (speculaas mold)
– Bake with low fire (140 C) approx 10-15 minutes
– Move cookies when it’s cold.
– This cookies are very fragile, arrange them in the tin and don’t move it around anymore unless you’re going to eat it 😉
Source: Nadrah Shahab

I first saw this in Paris couple years ago and immediately thought wow what a cute little morsels, so pretty with many colors and flavour but darn they weren’t cheap either. Ever since I bump into macarons here and there over the net but never did I got the guts to try it out, for I heard that they weren’t easy to make hence the price tag. Until earlier this month we at KBB received the challenge that I had to make it but I would be forever thankful to KBB, if not for this challenge I don’t know when would I have the courage.
As I ran out of time to do some try outs, so this was my first ever macarons and I think they turned out not so bad. I got the s0-called feet, YAY. Moreover I love this macarons more than shop bought version since this I found not too tooth achingly sweet, just perfect with a cup of coffee.
All in all some conclusion that I could make:
– Important to not over whip your egg white.
– Do not overbeat.
– Let it stand outside for aproximately 1 hour.
– Make sure the oven temperature is low at 140C.
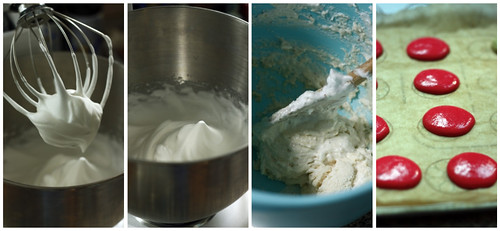
Basic French Meringue
For the shells:
– 90 gr egg whites (use eggs whites that have been preferably left 3-5 days in the fridge)
– 25 gr granulated sugar
– 200 gr powdered sugar
– 110 gr almonds (slivered, blanched, sliced, whatever you like) (I used almond meal)
– (I used 1 drop red gel food coloring)
Prepare the macarons:
– In a stand mixer fitted with the whisk attachment, whip the egg whites to a foam, (think bubble bath foam) gradually add the sugar until you obtain a glossy meringue (think shaving cream). Do not overbeat your meringue or it will be too dry.
– Place the powdered sugar and almonds and powdered color in a food processor and give them a good pulse until the nuts are finely ground.
– Add them to the meringue, give it a quick fold to break some of the air and then fold the mass carefully until you obtain a batter that falls back on itself after counting to 10.
– Give quick strokes at first to break the mass and slow down. The whole process should not take more than 50 strokes. Test a small amount on a plate: if the tops flattens on its own you are good to go. If there is a small beak, give the batter a couple of turns.
-Fill a pastry bag fitted with a plain tip (Ateco #807 or #809) with the batter and pipe small rounds (1.5 inches in diameter) onto parchment paper or silicone mats lined baking sheets.
– Let the macarons sit out for 30 minutes to an hour to harden their shells a bit. In the meantime, preheat the oven to 280F.
– When ready, bake for 15 to 20 minutes, depending on their size. Let cool. Once baked and if you are not using them right away, store them in an airtight container out of the fridge for a couple of days or in the freezer.
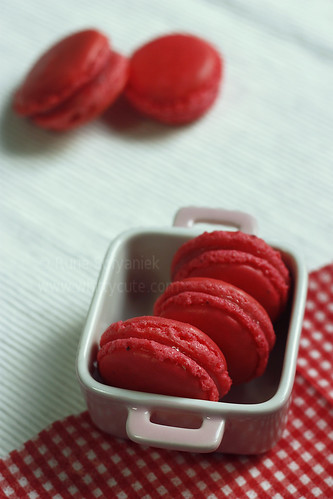
White Chocolate Raspberry Ganache:
– 1/2 cup cream
– 1 1/2 cup white chocolate
– 1/3 cup good quality raspberry jam
– Heat the cream until hot, drom white chocolate and raspberry jam into the cream and stir until all are melted and come together.
– Let cool and firm enough to pipe or spoon onto the macarons shells.
Source: Helen Dujardin

![masakbareng[1]](../../../../wp-content/uploads/masakbareng11.png)
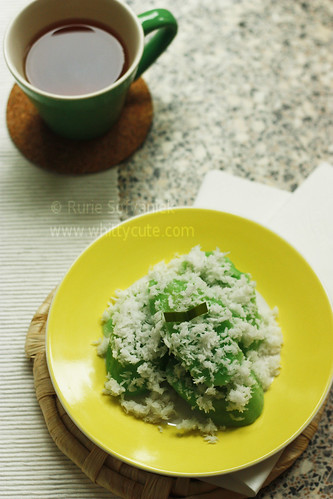
When I was making the batter for this dish yesterday, Masbul thought immediately whether I was making pisang goreng (fried banana). The batter for this dish was indeed similar with the one for pisang goreng but instead of frying the batter, we boiled it. This dish is not as popular as it’s fried version, I suppose Indonesians prefer fried snack than boiled. It’s too bad since I find it’s as nice as pisang goreng while being not too heavy and greasy but nevertheless Masbul made a point after having tasted this dish that he prefered pisang goreng than this one. *Sigh

For 2 portions:
– 1 banana (if you could grab plantain, that’s even better)
– 75 gr rice flour
– 100-150ml water
– Some drops of pandan essence
– 1 pandan leaf
– Steamed grated coconut (I used instant grated coconut)
– Pinch of salt
Directions:
– Cut banana into bite size pieces. Mix rice flour, salt, pandan essence and water into thick consistency.
– Coat banana generously with the batter, meanwhile boil a pan of water with the pandan leaf.
– When the water has boiled, dip the banana batter and boil with low fire for approximately 10 minutes.
– Drain with slotted spoon and served with steamed grated coconut.
It’s not blueberry season yet but I got this urge to make them, not sure why. Then as I shopped at the local supermarket I found this frozen blueberry with very reasonable price so without further ado I snapped it and brought it home, err of course by paying it first. Back home I suddenly remembered that I was still on the quest of finding just the right muffin recipe, a muffin that would go up high but yet still soft and moist in the inside. After much browsing here and there I came across Eliza’s muffin recipe and was so impressed with her review I just wanted to try the recipe instantly. Boy did I make the right the decision, the muffins were super easy to make yet the result was excellent, dome high, buttery moist muffin, highly recommended.
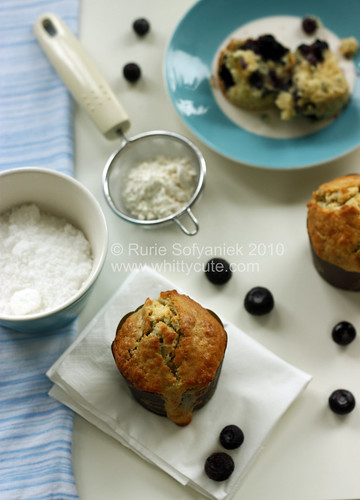
Makes 1 dozen muffins
1. Start the batter
Position a rack in the center of the oven and heat the oven to 350 degree F. Lightly oil (or spray with cooking spray) the top of a standard 12-cup muffin tins (cup should be 2 3/4 inches across and about 1 inch deep) and line with paper or foil baking cups
1 pound (3 1/2 cups) unbleached all-purpose flour
4 teaspoons baking powder
1/2 teaspoon baking soda
1/2 teaspoon table salt
1 1/3 cup granulated sugar
5 ounces (10 tablespoons) unsalted butter, melted and cooled slightly
1 cup whole milk, at room temperature
1 cup creme fraiche or sour cream, at room temperature (I used sour cream while other time I used yoghurt and it worked beautifully)
2 large eggs, at room temperature
1 large egg yolk, at room temperature
In a large mixing bowl, sift together the flour, baking powder, baking soda, and salt; mix well. In a medium mixing bowl, whisk together the sugar, butter, milk, creme fraiche or sour cream, eggs, and egg yolk until well combined.
Pour the wet ingredients into the dry, and fold gently with a rubber spatula just until the dry ingredients are mostly moistened (the batter will be lumpy)—there should still be quite a few streaks of dry flour.
2. Add your choice of flavorings, fruits, chocolate, and nuts (in my case frozen bluberry, do visit her blog to see other possibilities).
3. Fill the tin and bake the muffins
Use an ice cream scoop if you have one with a “sweeper” in it; otherwise, use two spoons to spoon the batter into the muffin cups, distributing all of the batter evenly. The batter should mound higher than the rim of the cups by about 3/4 inch. Bake until the muffins are golden brown and spring back lightly when you press the middle, 30 to 35 minutes. (The muffin tops will probably meld together.) Let the tin coll on a rack for 15 to 20 minutes.
Source: Eliza Adam

I’ve been away too long, I know. So many things have happened in the past few months. Maybe at some point soon I’m going to tell you the story but as for now spring has sprung in Europe and I’m trying to get back to the normal routine.
Though spring is here, it doesn’t mean that the weather is all warm everyday, just like typical European weather everyday is not the same. So this type of warm sweet porridge for an afternoon snack accompanied with hot jasmine tea (which of course I brought especially from Indonesia). Enjoy.
Want to join MasBar? It’s a monthy Indonesian food blogger event with no string attached whatsoever. All you need to do is cook the food relating to the theme of the month, take a picture of it, post it on your blog and send the picture and short story to us . Do visit our blog here for more information.

For 2 persons
Ingredients:
– 1 cup glutinous black rice (soaked for at least 6 hours, better overnight)
– 100 gr sugar (or as you desired)
– 2 pandan leaves
– 2 liter water
Coconut Milk Sauce:
– 200ml thick coconut milk (I used canned one)
– Pinch of salt
Directions:
– In a saucepan, bring water and glutinous black rice to a boil, stir now and then until the mixture is soft.
– Add sugar and pandan leaves, simmer until it forms porrigde.
– Warm up the coconut milk with pinch of salt.
– Serve the porridge warm with coconut milk sauce.
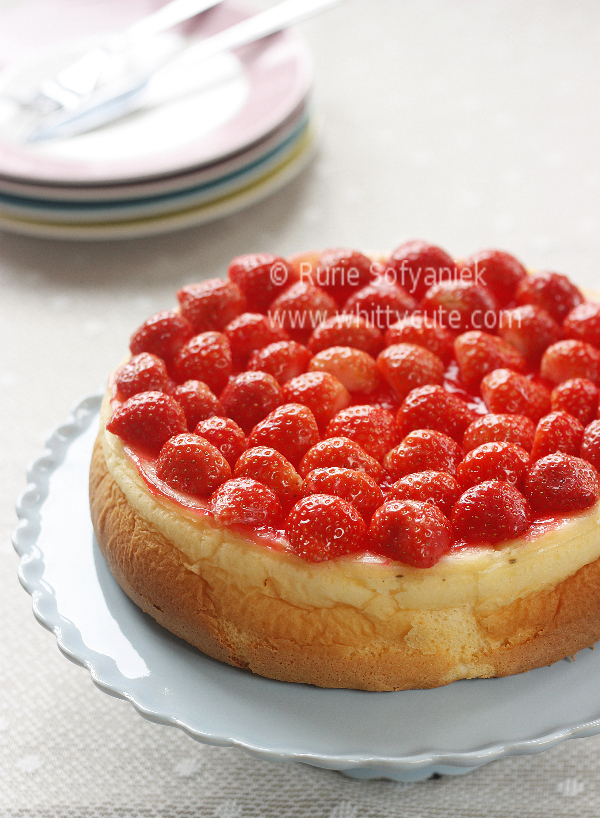
I have posted this cheese cake like 2 years ago here but have a look there and compare the picture of the cheese cake from that year with this one. Very different eh? It means along the years I did learn a thing or two. Still so much to learn though in Food Photography, however I’m enjoying it so much I barely feel it as learning.
Mix and sift:
– 50 gr flour (all purpose)
– 50 gr cornstarch
Ingredients:
– 60 gr unsalted butter
– 250 gr cream cheese, at room temperature
– 120 ml whipping cream
– 5 egg yolks
– 2 tsp grated lemon rind
– 5 egg whites
– 1/8 tsp salt
– 125 gr castor sugar
– 1 tsp lemon juice
Topping:
– Fresh Strawberries
– White transparant agar-agar or gelatine
– Line the bottom of a round 22cm spring form with baking grease with butter or margarine and sprinkle flour on the surface.
– Heat the oven at 150 degree celcius.
– Put together in a sauce pan: butter, cream cheese and whipping cream. Cook au-bain marie on low heat, stir with a wisk until butter and cream cheese melted and nicely combined.
– Wait until the mixture is not so hot. Mix in flour mixture, blend well. Stir in yolks, blend well. Stir in grated lemon rind, blend well, set aside.
– Beat the egg whites until frothy, beat in sugar and lemon juice gradually while continue beating until it forms soft peaks.
– Spoon 1/3 of egg whites batter into cream cheese mixture, blend well. Fold in this batter to the remaining egg whites batter, blend well. Pour batter into round spring form pan, bake au bain marie (water bath) for approximately 75 minutes until the surface is golden yellow in color, and a tooth pick insert in the cake comes out clean, . Remove from oven, let cool.
– After the cake is completely cooled, transfer cake onto plate. Mix agar-agar or gelatin according to package. Line the straberries on top of the cake, Brush the cake surface with the agar-agar or gelatine mixture, let cool.
Source: 35 Cheesecake Recipes Variation by Yasaboga
 The first KBB for this year with chocolate theme. It’s quiet challenging since there were some severals steps that was needed to be done. First you need to make the cookie dough then refrigerate it for several hours. While you’re waiting you could make the mud cake and ganache. After finishing those two finally you could bake the cookies and assemble them.
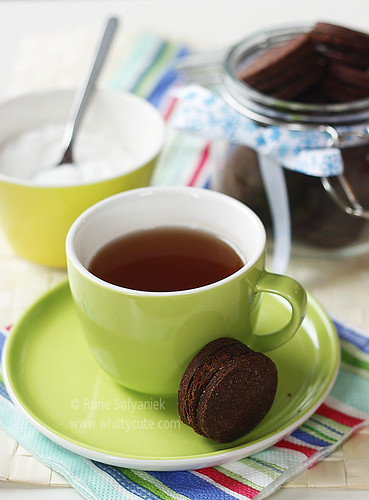
My cookies turned out to be perfect, they didn’t become wide when I baked them. The key to successful cookies making that you shouldn’t whisk the butter and sugar for too long, just enough until they mix for 2-3 minutes. On the other hand the pan size of the mud cake as mentioned by some fellow KBB-ers, needed to be changed to a smaller one indeed. I did just so to avoid the mud cake becoming too dry and thin, but as a result I got a thicker mud cake. It would be ok if the purpose was just for eating but for this the mud cake was meant as a filling between two cookies. Thus the sandwich name. However I found simple solution, just by cutting them first with a cookie cutter with the same size as the cookie and then again slice them horizontally into two. Sandwich between two cookies with ganache as “the glue”, hmm it was a superb cookies I must say (or we must say as there were some people sampling these yummy treats). My husband even say that it was way better than that famous chocolate cookies sandwich (you must know which famouse cookies sandwich he meant ^_* )
So don’t be discouraged by the long title and process, it was simply worth it.

Makes 24 (Mine yielded way more than this since I cut them 5 cm)
Cookies
– 250g butter, softened
– 330g firmly packed brown sugar (I reduced to 260 gr)
– 2 eggs
– 450g plain flour (I reduced to 400 g)
– 75g self-raising flour
– 50g cocoa powder
– 2 Tbs cocoa powder, extra
– Beat butter, sugar and eggs in small bowl with electric mixer until combined.
– Transfer mixture to large bowl; stir in sifted flours and cocoa, in two batches.
– Knead dough on floured surface until smooth; divide in half, roll each portion between sheets of baking paper until 5mm thick.
– Cover; refrigerate 30 minutes. (I refrigerated longer, approx 1 hour)
Chocolate Mud Cake
– 150g butter, chopped
– 100g dark eating chocolate, chopped coarsely
– 220g caster sugar (I reduced to 180 g)
– 125ml water
– 2 Tbs coffee liqueur
– 150g plain flour
– 2 Tbs cocoa powder
– 2 egg yolks
– Combine butter, chocolate, sugar, the water and liqueur in small saucepan. Stir over low heat until smooth.
– Place mixture in medium bowl; cool 10 minutes. Whisk in sifted flour and cocoa, then egg yolks. Bake about 25 minutes.
– Cool cakes in pans. Using 6.5cm round cutter, (I used 5cm cookie cutter) cut 12 rounds from each cake.
Chocolate Ganache
– 80ml cream
– 200g dark eating chocolate, chopped coarsely
– Bring cream to a boil in small saucepan; remove from heat.
– Add chocolate; stir until smooth. Refrigerate until spreadable.
Finishing
– Preheat oven to 170C/150C fan-forced. Grease two 20cm x 30cm lamington pans (I used 22 cm x 22 cm pan); line with a strip of baking paper, extending paper 2cm above edges of pans.
– Make chocolate mud cake. (I sliced the mud cake into two pieces after cutting them with 5 cm cookie cutter)
– Make chocolate ganache.
– Preheat oven to 180C/160C fan-forced. Grease oven trays; line with baking paper.
– Using 6.5cm round cutter (I used 5cm cookie cutter), cut 48 rounds from the cookie dough. Place about 3cm apart on oven trays. Bake about 12 minutes. Cool on wire racks.
– Spread ganache onto underside of cookies; sandwich a mud cake round between two cookies.
– Using heart template, dust cookies with extra cocoa.
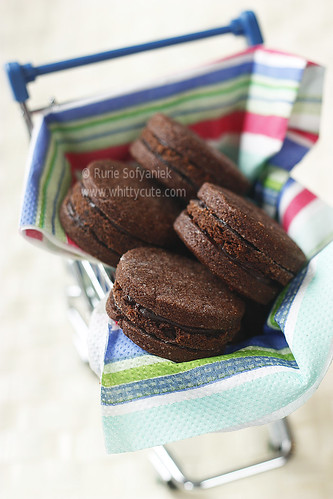
PS: Since I took the photo the day after I made it (due to lack of the sun in winter), I completely forgotten about the dusting the cookie with heart template, so forgive me.
Source: The Australian Women’s Weekly: cupcakes, cheesecake, cookies. ACP Magazine Ltd. 2008

 Hip hip hoera, Happy 2nd Birthday KBB!!! Semoga KBB makin jaya dan selalu jadi tempat kita semua untuk belajar baking sama2. Hip hip hoera, Happy 2nd Birthday KBB!!! Semoga KBB makin jaya dan selalu jadi tempat kita semua untuk belajar baking sama2.
There were actually 2 competitions that we could enter as the KBB member but I’m really sorry I could only enter 1 which is the food photography competition.
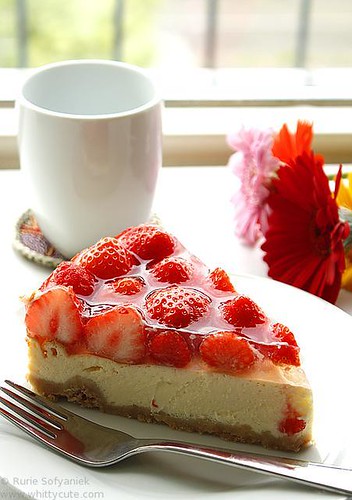
For recipe click here. I just changed the lemon glaze into strawberry.
 Hip hip hoera, Happy 2nd Birthday KBB!!! Semoga KBB makin jaya dan selalu jadi tempat kita semua untuk belajar baking sama2. Hip hip hoera, Happy 2nd Birthday KBB!!! Semoga KBB makin jaya dan selalu jadi tempat kita semua untuk belajar baking sama2.
There were actually 2 competitions that we could enter as the KBB member but I’m really sorry I could only enter 1 which is the food photography competition.

For recipe click here. I just changed the lemon glaze into strawberry.
Duh punya utang posting ama Teh Mira ^_^ Maap ya pake lama bu….
Actually I wanted to make banana cake ala Nich Rachmah that day but…….when I opened her FB I saw Mira just posted this. Uh oh so I changed my mind and cheated on Ning Rachmah…..hiahaha….sorry ya….aku berpaling ke lain hati……sama seperti Mira…..
I brought this along with Espresso Brownies to my last day of school which mean the exams announcement day. The teacher and my fellow classmates loved the cakes that I brought. But mind you it’s not a real school that I was following, just a course I’m taking to learn Dutch or NT2 (Nederlands voor Tweede Taal) or Dutch as Second Language or in my case as third language lol. Yes I did passed the niveau 2 (level 2) with somewhat flying colors (lol-kepala-besar-mode-on) and in September I am going to continue niveau 3. Wish me luck ^_^
Teh Mira, makasih dah share resepnya, endang banget dah ni, moist dan bumbunya kerasa…..jadi pengen lagi euy….
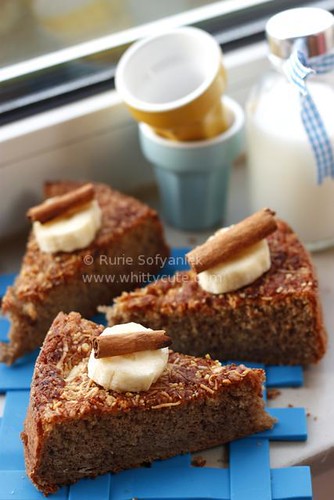
Ingredients:
– 4 eggs
– 50 gr palm sugar
– 25 gr sugar
– 1/4 tsp salt
– 1/2 tsp emulsifier (SP/TBM)
– 120 gr flour
– 1/2 tsp spekkoek spices (I used 1 tsp)
– 1/4 tsp baking powder
– 100 gr banana, pound until smooth
– 25 gr butter, melted
Directions:
– Shift all dry ingredients.
– Grease and sprinkle with flour a tulband baking pan (I used 20cm round baking pan).
– Whisk eggs, palm sugar, salt and emulsifier until fluffy.
– Add shifted dry ingredients, mix together carefully.
– Add banana and melted butter, mix together.
– Pour in the baking pan and bake in preheated oven 180C until done.
Source: Tabloid Saji through Mira Assjarif
|
Awards
 My First Award, Thank You!
Whittycute Foodie Event
 Click here to see the round up!
|


![masakbareng[1]](../../../../wp-content/uploads/masakbareng11.png)


